카테고리 보관물: ovirt

hypervisor 에서 xrdp를 썼을 때 생기는 문제…

xrdp를 사용하다가 난감했던 경우가 있다.

한번은 고객상서 xrdp 접속이 안된다는 것이다. 그래서 가봤더니 진짜 안되더라. 문제는 특정 vmxrdp가 써야하는 5910 port를 쓰고 있어서 안되는것이엇다. 그래서 이 vm을 죽이고 띄웠더니 되더라.

이것은 한시적인 해결법이고 언제든 또 저 port를 누군가가 점유하고 있으면 xrdp접속이 안될것이다.

그래서 저 5910 포트를 다른것으로 고쳐야지 완전한 해결책이 되는데…

그 때 정말 한참 찾아봤던걸로 기억한다.

hypervisor에서 xrdp를 사용 할 경우 vm이 사용하는 port와 다른 port를 사용하게 해줄 필요가 있다.

xrdp는 기본적으로 5910번 부터 5920번까지 10개의 세션까지 붙을 수 있게끔 되어 있다. 아래서 옵션을 확인해보자.

만약 hypervisorvm10개 미만으로 올라가 있다면 문제는 생기지 않는다. 하지만 위에서 생긴 문제는 hypervisorvm100개 가량 돌고 있었고…ㄷㄷ 당시 이것을 구축한 사람은 문제해결을 못해서 쩔쩔매고 있었다. 나도 엄청 찾았다. 그도 그럴게 xrdp가 동작방식이 되게 베베꼬여있다.

그냥 3389 portservice를 해주는 것이 아닌… 일반적인 windows 환경에서 RDP 3389 port로 요청을 보내면 xrdpxrdp-sesman 3350 port로 요청을 전달한다. 그럼 xrdp-sesmanXvnc를 써서 vncserver를 구동 한 후 그것을 다시 3389로 보내서 연결 시켜주는 형식이다. 이걸 당시 debug mode를 써서 알아냈었다…

암턴 … 저때의 Xvnc 가 생성하는 port가 기본적으로 5910번부터 5920번 까지 사용하는데… 이걸 다른 process가 막아버리면 얘는 당연히 뜨질 못하고 연결이 안되는것이다.

자 그럼… config file을 열어보면…

# vim /etc/xrdp/sesman.ini

[Sessions]

X11DisplayOffset=10

MaxSessions=10

KillDisconnected=0

IdleTimeLimit=0

DisconnectedTimeLimit=0

요런 구문이 있는데 “X11DisplayOffset이놈이 Xvnc vncserver display session offset을 결정하는 구문이다. 쉽게말해 저걸 100으로 고치면 5900 + 100 이 되어 Xvnc 6000번 부터 port를 사용하게 된다.

그리고 아래의 “MaxSessions는 허용할 session의 총 갯수이다. 기본으로 10개까지 허용하고 있다. 이러면 Xvnc 6000 ~ 6010 까지의 port를 사용하게 될것이다.

후… 옛날에 설정 해놓고 잊어버렸던거라 가물가물 했었는데 … posting 하니까 한결 편해졌다. 이제 안까먹겠지… ㅋㅋ

kvm 에서 vm template 만들기

문득 kvm에서 template를 만들어 쓸 순 없을까 라는 생각을 했다.

Disk 용량도 부족한데 … 1개의 가상머신에 10GB 되는 용량을 매번 부여하기가 힘들었다.

그래서 찾아봤는데 lvm thin provisioning 을 이용해서 tempate을 만드는게 잇더라.

정확히 말하면 lvm을 이용해서 template를 만드는게 있었는데 난 거기다 thin volume을 만들어서 좀더 용량을 아끼고 싶엇다. (회사에서 노트북 사줫는데 storage 용량이 198GB임… ; 그래도 memory 32GB랑 기능이 많아서 대 만족중 ㅎㅎ)

내가 참조한 site는 여기 !! https://dnaeon.github.io/creating-a-template-for-kvm-virtual-machines/

일단 나는 lvm thin provisioning volume을 만들어서 template(만든다음 그냥 안쓰기 ㅋ) 한 다음, 이걸 snapshot 을 이용해서 volume을 만들고 이걸 이용해서 kvm virtual machine 을 만든다.

시작!

먼저 lvm 을 이용해서 thin volume 을 만들자.

root@youngjulee-ThinkPad-S2:~# lvcreate –thinpool youngju-group/vms_thinpool -L 40G

### youngju-group 이라는 vgs(volume group) vms_thinpool 이라는 logical volume을 만드는데 이걸 thin volumepool로 쓴다. ###

root@youngjulee-ThinkPad-S2:~# lvcreate -V20G -T youngju-group/vms_thinpool -n rhgs_template

### vms_thinpool 에서 rhgs_template 라는 logical volume을 만드는데 size20G로 한다. -V 옵션은 가상 size를 정하는 옵션으로 실제로 쓴 용량만큼만 할당 하는데 20G 까지 쓸 수 있다는 뜻이다. ###

virt-install script 를 만들엇다.

root@youngjulee-ThinkPad-S2:~# cat virt-install.sh

#!/bin/bash

VMNAME=$1

VMVOLUEM=$2

VMISO=$3

virt-install –connect qemu:///system \ ### localhost qemu hypervisor 에 접속

–name $VMNAME \ ### virtual mathine name

–memory 4096 \ ### memory

–vcpus 2 \ ### cpus

–disk path=/dev/youngju-group/$VMVOLUEM \ ### template 으로 사용할 logical volumepath

–network network=youngju-thinkpad \ ### 사용할 network 기본으로 default

–virt-type kvm \ ### virtual machine type kvm 으로 함.

–os-variant auto \ ### os 종류 인데 fedora 등등 하고 싶은거 하면되는데 auto로 하면 iso이미지 보고 지가 알아서 해줌 별로 중요한건 아니다.

–graphics vnc \ ### console type

–hvm \ ### hardware virtual machine 으로 hardware의 도움을 받아 가상머신을 만들겟다는뜻. 그러니까 full virtualization type으로 만들겟다. Para virtualization hardware의 도움 필요없이 virthal mathine 만들기가 가능한데 os에다가 vmm(virtual machine monitor)기능을 하는 코드를 심어 줘야 한다고 알고잇음.

–cdrom /home/youngjulee/iso/$VMISO ### install cdrom path

### $1 $2 $3 은 이 script를 실행 했을때 위치매개변수를 지정한다. 쉽게말해 virt-install.sh rhgs_template rhgs_template_volume rhgs-3.1-u2-rhel-7-x86_64-dvd-2.iso 이렇게 3 개의 위치 argument 가 들어가면 명령어는 $0 순서대로 $1rhgs_template (이름) $2 rhgs_template_voluem (logical volume name) $3 rhgs-3.1-u2-rhel-7-x86_64-dvd-2.iso (설치할 iso 이미지) 이렇게 되어 있다. ###

root@youngjulee-ThinkPad-S2:~# ./virt-install.sh rhgs_template rhgs_template rhgs-3.1-u2-rhel-7-x86_64-dvd-2.iso

os install 이 끝나고 나면, system 에서 쓸 tool들을 설치하고 나서 # sys-unconfig 를 한다.

root@youngjulee-ThinkPad-S2:~# sys-unconfig

### windows sysprep 같은건데 system uuid 나 이런것들을 삭제시켜 준다. 재 부팅 시 다시 만들어줌. ###

root@youngjulee-ThinkPad-S2:~# lvcreate -s -T youngju-group/rhgs_template -n rhgs1

### rhgs_template volumesnapshot을 뜬다. -T 옵션은 snapshot을 뜰 thin volume을 지정해준다. -s 옵션은 snapshot을 뜨겟단 뜻 ###

root@youngjulee-ThinkPad-S2:~# lvchange -kn youngju-group/rhgs_template

### 중요한건데 snapshot volume은 만들어지면 defaultactive가 안되게끔 attr 의 마지막 k 가 켜져 있다. 뭔말이냐면 이 마지막의 klvchange –ay 명령어로 activation 할때 skip 하겠다는 뜻이다. 그래서 lvchange -ay activation 할때 -K option을 써서 activation skip을 무시 하고 activation 할건지 아니면 -kn option으로 activation skip option을 없애거나 해야한다. -K option을 하면 재부팅 후 자동으로 activation 되어 있지 않다.

root@youngjulee-ThinkPad-S2:~# lvs -o lv_name,attr,lv_role

LV Attr Role

home -wi-ao—- public

rhceph_template Vwi-a-tz– public

rhgs1 Vwi-a-tz-k public,snapshot,thinsnapshot

### 위의 k 때문에 일반적인 방법으로는 activation 이 안된다. 위에 기술된 내용으로 activation 시키자. ###

root@youngjulee-ThinkPad-S2:~# cat virt-install-template.sh

#!/bin/bash

VMNAME=$1

VMVOLUEM=$2

virt-install –connect qemu:///system \

–name $VMNAME \

–memory 4096 \

–vcpus 2 \

–disk path=/dev/youngju-group/$VMVOLUEM \

–network network=youngju-thinkpad \

–virt-type kvm \

–os-variant auto \

–graphics vnc \

–hvm \

–boot hd ### 요것만 틀림

### 위랑 다 똑같은데 booting hard disk로 한다. 이때 hard disk는 위에서 만든 snapshot volume으로 한다. ###

이렇게 해서 thin volume template 가 되고 snapshot이 가상머신 image 가 되엇다.

Snapshot 을 수십개 떠서 돌려도 실제로 차지하는 disk 용량은 template 용량 + 가상머신들이 부팅 후 실제 사용한 용량“ 이 된다. 내경우 8install 만 하니까 2GB도 안쓰더라.

Ovirt 가 이런식으로 가상머신 image 관리 하는것 같음.

ovirt-engine HA(active backup) cluster 구성 3 부


luci를 이용한 cluster share resouce 생성

luci webpage에서 …

Manage Clusters > Resouces > Add > IP Address

4

56

### !!! file system ID 는 비워둔다. (자동으로 들어감) ###

### file system resource는 위의 lvm 과 같게 만들어준다. 6!! ###

7 8

9

Manage Clusters > rhevm-cluster > service Groups > Add

10

Cluster Service Group 생성 후 Add Resouce 를 클릭

192.168.144.30/24

ovirt ha lvm

etc-ovirt-engine

usr-share-ovirt-engine

usr-share-ovirt-engine

usr-share-ovirt-engine-wildfly

var-lib-ovirt-engine

var-lib-pgsql

postgresql

ovirt-engine-service

apache service

### 위와 같은 순서로 resouce 등록 (apache service IP Address 보다 앞에 있으면 안됨)###

### /etc/cluster/cluster.conf (예제) ###

<?xml version=”1.0″?>

<cluster config_version=”33″ name=”rhevm-cluster”>

<clusternodes>

<clusternode name=”node1.test.dom” nodeid=”1″>

<fence>

<method name=”xvm fence”>

<device delay=”1″ domain=”225.0.1.12″ name=”kvm_xvm”/>

</method>

</fence>

</clusternode>

<clusternode name=”node2.test.dom” nodeid=”2″>

<fence>

<method name=”xvm fence”>

<device delay=”2″ domain=”225.0.1.12″ name=”kvm_xvm”/>

</method>

</fence>

</clusternode>

</clusternodes>

<cman expected_votes=”1″ two_node=”1″/>

<fencedevices>

<fencedevice agent=”fence_xvm” name=”kvm_xvm” timeout=”2″/>

</fencedevices>

<rm>

<failoverdomains>

<failoverdomain name=”ovirt_failover_domain” ordered=”1″ restricted=”1″>

<failoverdomainnode name=”node1.test.dom” priority=”1″/>

<failoverdomainnode name=”node2.test.dom” priority=”2″/>

</failoverdomain>

</failoverdomains>

<resources>

<ip address=”192.168.144.30/24″ sleeptime=”10″/>

<lvm name=”ovirt ha lvm” vg_name=”RHEVM”/>

<fs device=”/dev/RHEVM/etc-ovirt-engine” fsid=”63050″ fstype=”ext4″ mountpoint=”/etc/ovirt-engine” name=”etc-ovirt-engine” self_fence=”1″/>

<fs device=”/dev/RHEVM/usr-share-ovirt-engine” fsid=”45498″ fstype=”ext4″ mountpoint=”/usr/share/ovirt-engine” name=”usr-share-ovirt-engine” self_fence=”1″/>

<fs device=”/dev/RHEVM/usr-share-ovirt-engine-wildfly” fsid=”27022″ fstype=”ext4″ mountpoint=”/usr/share/ovirt-engine-wildfly” name=”usr-share-ovirt-engine-wildfly” self_fence=”1″/>

<fs device=”/dev/RHEVM/var-lib-ovirt-engine” fsid=”38611″ fstype=”ext4″ mountpoint=”/var/lib/ovirt-engine” name=”var-lib-ovirt-engine” self_fence=”1″/>

<fs device=”/dev/RHEVM/var-lib-pgsql” fsid=”47186″ fstype=”ext4″ mountpoint=”/var/lib/pgsql” name=”var-lib-pgsql” self_fence=”1″/>

<script file=”/etc/init.d/postgresql” name=”postgresql”/>

<script file=”/etc/init.d/ovirt-engine” name=”ovirt-engine-service”/>

<apache config_file=”conf/httpd.conf” name=”apache service” server_root=”/etc/httpd” shutdown_wait=”5″/>

<fs device=”/dev/RHEVM/etc-pki-ovirt-engine” fsid=”8507″ fstype=”ext4″ mountpoint=”/etc/pki/ovirt-engine” name=”etc-pki-ovirt-engine” self_fence=”1″/>

</resources>

<service domain=”ovirt_failover_domain” name=”ovirt-ha-cluster” recovery=”relocate”>

<ip ref=”192.168.144.30/24″/>

<lvm ref=”ovirt ha lvm”/>

<fs ref=”etc-ovirt-engine”/>

<fs ref=”etc-pki-ovirt-engine”/>

<fs ref=”usr-share-ovirt-engine”/>

<fs ref=”usr-share-ovirt-engine-wildfly”/>

<fs ref=”var-lib-ovirt-engine”/>

<fs ref=”var-lib-pgsql”/>

<script ref=”postgresql”/>

<script ref=”ovirt-engine-service”/>

<apache ref=”apache service”/>

</service>

</rm>

</cluster>

[root@node1 ~]# clusvcadm –r ovirt-ha-cluster

Trying to relocate service:ovirt-ha-cluster…Success

[root@node1 ~]# clustat

Cluster Status for rhevm-cluster @ Wed May 18 15:54:49 2016

Member Status: Quorate

Member Name ID Status

—— —- —- ——

node1.test.dom 1 Online, Local, rgmanager

node2.test.dom 2 Online, rgmanager

Service Name Owner (Last) State

——- —- —– —— —–

service:ovirt-ha-cluster node2.test.dom started

### cluster 절차 test. 이와 같이 나오면 성공!! ###


^11^

ovirt-engine HA(active backup) cluster 구성 2 부

구성 2부임. 용량때문인지 한꺼번에 다 안올라감 ㅋ


[root@node1 ~]# yum install http://resources.ovirt.org/pub/yum-repo/ovirt-release36.rpm

[root@node1 ~]# yum install -y ovirt-engine-setup

[root@node1 ~]# engine-setup

[ INFO ] Stage: Initializing

[ INFO ] Stage: Environment setup

Configuration files: [‘/etc/ovirt-engine-setup.conf.d/10-packaging-jboss.conf’, ‘/etc/ovirt-engine-setup.conf.d/10-packaging.conf’]

Log file: /var/log/ovirt-engine/setup/ovirt-engine-setup-20160518012835-iqr01z.log

Version: otopi-1.4.1 (otopi-1.4.1-1.el6)

[ INFO ] Stage: Environment packages setup

[ INFO ] Stage: Programs detection

[ INFO ] Stage: Environment setup

[ INFO ] Stage: Environment customization

–== PRODUCT OPTIONS ==–

Configure Engine on this host (Yes, No) [Yes]:

Configure VM Console Proxy on this host (Yes, No) [Yes]:

Configure WebSocket Proxy on this host (Yes, No) [Yes]:

–== PACKAGES ==–

[ INFO ] Checking for product updates…

[ INFO ] No product updates found

–== ALL IN ONE CONFIGURATION ==–

–== NETWORK CONFIGURATION ==–

Host fully qualified DNS name of this server [localhost]: node0.test.dom

### 반드시 가상 ip로 한다. 이 이름을 기반으로 ca 인증서들 만듦. ###

[WARNING] Failed to resolve node0.test.dom using DNS, it can be resolved only locally

Setup can automatically configure the firewall on this system.

Note: automatic configuration of the firewall may overwrite current settings.

Do you want Setup to configure the firewall? (Yes, No) [Yes]: no

[WARNING] Failed to resolve node0.test.dom using DNS, it can be resolved only locally

[WARNING] Failed to resolve node0.test.dom using DNS, it can be resolved only locally

–== DATABASE CONFIGURATION ==–

Where is the Engine database located? (Local, Remote) [Local]:

Setup can configure the local postgresql server automatically for the engine to run. This may conflict with existing applications.

Would you like Setup to automatically configure postgresql and create Engine database, or prefer to perform that manually? (Automatic, Manual) [Automatic]:

–== OVIRT ENGINE CONFIGURATION ==–

Application mode (Virt, Gluster, Both) [Both]:

Engine admin password:

Confirm engine admin password:

[WARNING] Password is weak: 사전에 있는 단어를 기반으로 합니다

Use weak password? (Yes, No) [No]: yes

–== STORAGE CONFIGURATION ==–

Default SAN wipe after delete (Yes, No) [No]:

–== PKI CONFIGURATION ==–

Organization name for certificate [test.dom]:

–== APACHE CONFIGURATION ==–

Setup can configure apache to use SSL using a certificate issued from the internal CA.

Do you wish Setup to configure that, or prefer to perform that manually? (Automatic, Manual) [Automatic]:

Setup can configure the default page of the web server to present the application home page. This may conflict with existing applications.

Do you wish to set the application as the default page of the web server? (Yes, No) [Yes]:

–== SYSTEM CONFIGURATION ==–

Configure an NFS share on this server to be used as an ISO Domain? (Yes, No) [Yes]: no

–== MISC CONFIGURATION ==–

–== END OF CONFIGURATION ==–

[ INFO ] Stage: Setup validation

[WARNING] Cannot validate host name settings, reason: resolved host does not match any of the local addresses

[WARNING] Less than 16384MB of memory is available

–== CONFIGURATION PREVIEW ==–

Application mode : both

Default SAN wipe after delete : False

Update Firewall : False

Host FQDN : node0.test.dom

Engine database secured connection : False

Engine database host : localhost

Engine database user name : engine

Engine database name : engine

Engine database port : 5432

Engine database host name validation : False

Engine installation : True

PKI organization : test.dom

Configure local Engine database : True

Set application as default page : True

Configure Apache SSL : True

Configure VMConsole Proxy : True

Engine Host FQDN : node0.test.dom

Configure WebSocket Proxy : True

Please confirm installation settings (OK, Cancel) [OK]:

### node1 engine-setup ###

[root@node1 ~]# cat ser

postgresql

ovirt-engine

httpd

[root@node1 ~]# for i in `cat ser`; do service $i stop; chkconfig $i off; done

[root@node2 ~]# cat ser

postgresql

ovirt-engine

httpd

[root@node2 ~]# for i in `cat ser`; do service $i stop; chkconfig $i off; done

### service stop; chkconfig off ###

[root@node1 nodes]# scp -r /etc/httpd/ node2:/etc/

### apache httpd.conf sync ###

[root@node1 nodes]# lvmconf –disable-cluster

[root@node1 nodes]# grep ‘[[:space:]] locking_type’ /etc/lvm/lvm.conf

locking_type = 1

[root@node1 ~]# grep ‘[[:space:]] volume_list’ /etc/lvm/lvm.conf

volume_list = [ “vg_node1”, “@node1.test.dom” ]

[root@node1 ~]# dracut -H -f /boot/initramfs-$(uname -r).img $(uname -r)

[root@node2 ~]# lvmconf –disable-cluster

[root@node2 ~]# grep ‘[[:space:]] volume_list’ /etc/lvm/lvm.conf

volume_list = [ “vg_node2”, “@node2.test.dom” ]

[root@node2 ~]# grep ‘[[:space:]] locking_type’ /etc/lvm/lvm.conf

locking_type = 1

[root@node2 ~]# dracut -H -f /boot/initramfs-$(uname -r).img $(uname -r)

### node1node2 에서 ha lvm 설정 ###

3부 계속… 사진때문인가… 다 안올라가네…


ovirt-engine HA(active backup) cluster 구성

RHEVM(ovirt-engine) HA test

참고자료

https://access.redhat.com/articles/216973 의 문서 참고함.

3.1문서 보다 3.0문서가 더 좋음.

2주간 3.1 문서 보면서 삽질을 했는데, 성공 하고 난 후 3.0 문서보니까 삽질하면서 찾았던것들이 여기 다 나오더라.

3.1 문서대로 하면 될 수가 없음. ㅋㅋ

환경

kvm instance : 2 ea

os version : centos 6.7

ovirt version : 3.6

cpu : 2

memory : 4096

storage : HDD 20G

ip addrress

192.168.144.31 node1.test.dom

192.168.144.32 node2.test.dom

192.168.144.30 node0.test.dom ( cluster resource 가상 ip )

os install이 끝난 후

[root@node1 ~]# cat /etc/selinux/config |grep -v ^# | grep -v ^$

SELINUX=permissive

SELINUXTYPE=targeted

### selinux permissive ###

[root@node1 ~]# chkconfig iptables off

[root@node1 ~]# service iptables off

### test의 편의를 iptables sevice off ###

[root@node1 ~]# yum update -y && yum groupinstall ‘high availability’ && reboot

### yum update ha group install 해준다. 그리고 kernel version update 를 위해 reboot ###

####### iptable 설정 예 ######

posting 에서는 편의를 위해 iptable 을 끄고 함.

# iptables -N RHCS

# iptables -I INPUT 1 -j RHCS

# iptables -A RHCS -p udp --dst 224.0.0.0/4 -j ACCEPT

# iptables -A RHCS -p igmp -j ACCEPT

# iptables -A RHCS -m state --state NEW -m multiport -p tcp --dports \

40040,40042,41040,41966,41967,41968,41969,14567,16851,11111,21064,50006,\

50008,50009,8084 -j ACCEPT

# iptables -A RHCS -m state --state NEW -m multiport -p udp --dports \

6809,50007,5404,5405 -j ACCEPT

# service iptables save

[root@node1 ~]# chkconfig ricci on && service ricci start

[root@node1 ~]# echo test123 | passwd ricci –stdin

ricci 사용자의 비밀 번호 변경 중

passwd: 모든 인증 토큰이 성공적으로 업데이트 되었습니다.

### ricci service on ricci 사용자 passwd 를 test123 로 등록 ###

[root@node1 ~]# yum install -y luci && chkconfig luci on && service luci start

### luci install, luci 는 다른 가상머신이나 다른곳에 설치 후 사용하는게 더 좋다. Cluster member luci가 깔려 있으면 큰 오류는 아니지만 약간 오작동을 했었다. ###

web browser 에서 luci 접속

https://node1.test.dom:8084

cluster 생성

Manage clusters > create 클릭 하면 아래와 같이 입력.

1

xvm Fence device 만들기

Manage clusters > rhevm-cluster > Fence Devices 클릭

https://access.redhat.com/solutions/293183 참고하여 xvm fence device 만든 후 등록 함. 궂이 등록하지 않아도 fencing 은 된다.

2

3

위와 같이 등록 하였다.

Iscsi 설정

iscsi server(node1 node2를 제외한) 에서 다음과 같이 volume을 만들어 준다.

Rhel7 에서 targetcli 이용 하여 volume 만듬.

/iscsi/iqn.20…u-test-domain> ls

o- iqn.2016-04.test.dom:youngju-test-domain ……………………………… [TPGs: 1]

o- tpg1 ………………………………………………… [no-gen-acls, no-auth]

o- acls ………………………………………………………….. [ACLs: 2]

| o- iqn.2016-04.test.dom:nestedkvm …………………………… [Mapped LUNs: 1]

| | o- mapped_lun0 ………………………………….. [lun0 block/youngju (rw)]

| o- iqn.2016-05.dom.test:ovirt1 ……………………………… [Mapped LUNs: 1]

| | o- mapped_lun0 …………………………………. [lun1 block/youngju2 (rw)]

| o- iqn.2016-05.dom.test:ovirt2 ……………………………… [Mapped LUNs: 1]

| | o- mapped_lun0 …………………………………. [lun1 block/youngju2 (rw)]

| o- iqn.2016-05.dom.test:rhevm1 ……………………………… [Mapped LUNs: 1]

| | o- mapped_lun2 …………………………………. [lun2 block/youngju3 (rw)]

| o- iqn.2016-05.dom.test:rhevm2 ……………………………… [Mapped LUNs: 1]

| o- mapped_lun2 …………………………………. [lun2 block/youngju3 (rw)]

o- luns ………………………………………………………….. [LUNs: 3]

| o- lun0 …………………………….. [block/youngju (/dev/vg_iscsi/youngju1)]

| o- lun1 ……………………………. [block/youngju2 (/dev/vg_iscsi/youngju2)]

| o- lun2 ……………………………. [block/youngju3 (/dev/vg_iscsi/youngju3)]

o- portals …………………………………………………….. [Portals: 1]

o- 0.0.0.0:3260 ……………………………………………………… [OK]

/iscsi/iqn.20…u-test-domain>

[root@node1 ~]# yum install -y iscsi-initiator-utils

[root@node1 ~]# cat /etc/iscsi/initiatorname.iscsi |grep -iv ^#

InitiatorName=iqn.2016-05.dom.test:rhevm1

[root@node1 ~]# iscsiadm -m discovery -t st -p 10.10.10.10

10.10.10.10:3260,1 iqn.2016-04.test.dom:youngju-test-domain

[root@node1 nodes]# iscsiadm -m node -l

[root@node2 ~]# yum install -y iscsi-initiator-utils

[root@node2 ~]# cat /etc/iscsi/initiatorname.iscsi |grep -iv ^#

InitiatorName=iqn.2016-05.dom.test:rhevm2

[root@node2 ~]# iscsiadm -m discovery -t st -p 10.10.10.10

10.10.10.10:3260,1 iqn.2016-04.test.dom:youngju-test-domain

[root@node2 ~]# iscsiadm -m node -l

### iscsi initiator를 설치하고 targetlogin 한다. ###

[root@node1 ~]# lsblk

NAME MAJ:MIN RM SIZE RO TYPE MOUNTPOINT

vda 253:0 0 20G 0 disk

├─vda1 253:1 0 500M 0 part /boot

├─vda2 253:2 0 1G 0 part [SWAP]

└─vda3 253:3 0 18.5G 0 part /

sr0 11:0 1 1024M 0 rom

sda 8:0 0 50G 0 disk

└─sda1 8:1 0 50G 0 part

[root@node1 ~]# lvs

LV VG Attr LSize Pool Origin Data% Meta% Move Log Cpy%Sync Convert

etc-ovirt-engine RHEVM -wi——- 1.00g

etc-pki-ovirt-engine RHEVM -wi——- 1.00g

usr-share-ovirt-engine RHEVM -wi——- 1.00g

usr-share-ovirt-engine-wildfly RHEVM -wi——- 2.00g

var-lib-ovirt-engine RHEVM -wi——- 5.00g

var-lib-pgsql RHEVM -wi——- 5.00g

### lvm 볼륨을 만들어 준다. ###

[root@node1 ~]# cat clusterdir

/etc/ovirt-engine

/etc/pki/ovirt-engine

/usr/share/ovirt-engine

/usr/share/ovirt-engine-wildfly

/var/lib/ovirt-engine

/var/lib/pgsql

[root@node1 ~]# for i in `cat clusterdir` ; do mkdir -p $i; done

### lvm volume mount point 생성 ###

mount /dev/RHEVM/etc-ovirt-engine /etc/ovirt-engine

mount /dev/RHEVM/etc-pki-ovirt-engine /etc/pki/ovirt-engine

mount /dev/RHEVM/usr-share-ovirt-engine /usr/share/ovirt-engine

mount /dev/RHEVM/usr-share-ovirt-engine-wildfly /usr/share/ovirt-engine-wildfly

mount /dev/RHEVM/var-lib-ovirt-engine /var/lib/ovirt-engine

mount /dev/RHEVM/var-lib-pgsql /var/lib/pgsql

### lvm volume mount ###

2 부 계속…

ovirt-shell vm add permission script

조잡하게나마 짜봤다.

ovirt 에서 window7 vm을 수백개 만들어서 일일히 permission을 다 마우스로 줘야 하는 노가다를 해야할때가 있는데 … 해보니까 정말 사람 할짓이 아니더라.

그래서 스크립트 짜봄 ㅇㅇ

  • 주의 user list와 vm list 가 있어야 함.

$ cat add-permissions

#!/bin/bash

cd ~

DOMAIN=”test.dom”

### domain 명을 넣어준다. ###

 
USERS=”/root/script/users”

### user 명들 list 가 적힌 text파일 위치 ###

 
VMS=”/root/script/vms”

### vm들 이름이 적힌 text 파일 위치 ###


paste $USERS $VMS |awk ‘{print $1″:”$2}’ > ~/script/test3

### vms 랑 users랑 한데 묶는다. ###

 
TEST=”/root/script/test3″

for ID in $(cat $TEST)
do

USER=`echo $ID |awk -F: ‘{print $1}’`
echo $USER

USERID=`ovirt-shell -E “list users –kwargs principal=$USER” |grep -i id |awk ‘{print $3}’`

### user id 뽑아내기 ###

 
VMID=`echo $ID |awk -F: ‘{print $2}’`

### vm id 뽑아내기 ###


ovirt-shell -E “add permissions –role-name UserRole –user-id $USERID –parent-vm-name $VMID”

### permission 넣기 ###


done


ovirt 3.5 (3/3)

admin console storage탭에서 data domain 과 iso domain을 추가 해준다.

data domain 추가

nfs type data domain 추가를 해준다.
ovirt 는 기본 nfs v3 를 사용한다.
방화벽을 열어 줄때도 nfs v3 기준으로 열어 줘야 한다.

nfs server 측에서 statd mountd lockd rpcbind nfs 이렇게 열어 줘야 한다.
statd lockd mountd는 기본이 유동 포트이므로 고정포트로 바꿔준다.

Rpc-statd    /etc/services 에 추가    status   4005/tcp
                                                                  status   4005/ucp
mountd    /etc/services 변경    mountd   4004/tcp
                                                         mountd   4004/tcp
nfs.lockd    /etc/sysconfig/nfs 추가    LOCKD_TCPPORT=4003
                                                                       LOCKD_UDPPORT=4003

[root@rhel ~]# iptables -I INPUT -p tcp -m multiport –dports 4003:4005 -j ACCEPT
[root@rhel ~]# iptables -I INPUT -p udp -m multiport –dports 4003:4005 -j ACCEPT
[root@rhel ~]# iptables -I INPUT -p tcp -m tcp –dport 2049 -j ACCEPT
[root@rhel ~]# iptables -I INPUT -p udp -m udp –dport 2049 -j ACCEPT
[root@rhel ~]# iptables -I INPUT -p tcp -m tcp –dport 111 -j ACCEPT
[root@rhel ~]# iptables -I INPUT -p tcp -m udp –dport 111 -j ACCEPT
[root@rhel ~]# iptables -I INPUT -p udp -m udp –dport 111 -j ACCEPT
[root@rhel ~]# service iptables save

이제 nfs share volume을 만들어 준다.

[root@rhel ~]# ssm list
————————————————————
Device         Free       Used      Total  Pool  Mount point
————————————————————
/dev/sda                        136.22 GB        PARTITIONED
/dev/sda1                       500.00 MB        /boot
/dev/sda2   0.00 KB   63.62 GB   63.62 GB  rhel
/dev/sda3  72.10 GB    0.00 KB   72.11 GB  rhel
/dev/sdb   28.87 GB  250.00 GB  278.88 GB  rhel
————————————————————
—————————————————-
Pool  Type  Devices       Free       Used      Total
—————————————————-
rhel  lvm   3        100.97 GB  313.62 GB  414.59 GB
—————————————————-
———————————————————————————
Volume          Pool  Volume size  FS     FS size       Free  Type    Mount point
———————————————————————————
/dev/rhel/root  rhel     50.00 GB  xfs   49.98 GB   42.70 GB  linear  /
/dev/rhel/swap  rhel     13.62 GB                             linear
/dev/rhel/kvm   rhel    250.00 GB  xfs  249.88 GB  249.88 GB  linear  /kvm
/dev/sda1               500.00 MB  xfs  496.67 MB  358.68 MB  part    /boot
———————————————————————————
[root@rhel ~]# mkdir /data
### share 할 /data 디렉토리 생성 ###

[root@rhel ~]# ssm create -p rhel -n data –fs xfs
### rhel pvgroup에서 volume 이름 data로 xfs format 한 volume 을 하나 생성 ###

Logical volume “data” created.
meta-data=/dev/rhel/data         isize=256    agcount=4, agsize=6617344 blks
=                       sectsz=512   attr=2, projid32bit=1
=                       crc=0        finobt=0
data     =                       bsize=4096   blocks=26469376, imaxpct=25
=                       sunit=0      swidth=0 blks
naming   =version 2              bsize=4096   ascii-ci=0 ftype=0
log      =internal log           bsize=4096   blocks=12924, version=2
=                       sectsz=512   sunit=0 blks, lazy-count=1
realtime =none                   extsz=4096   blocks=0, rtextents=0
[root@rhel ~]# ssm list
———————————————————–
Device        Free       Used      Total  Pool  Mount point
———————————————————–
/dev/sda                       136.22 GB        PARTITIONED
/dev/sda1                      500.00 MB        /boot
/dev/sda2  0.00 KB   63.62 GB   63.62 GB  rhel
/dev/sda3  0.00 KB   72.10 GB   72.11 GB  rhel
/dev/sdb   0.00 KB  278.87 GB  278.88 GB  rhel
———————————————————–
————————————————–
Pool  Type  Devices     Free       Used      Total
————————————————–
rhel  lvm   3        0.00 KB  414.59 GB  414.59 GB
————————————————–
———————————————————————————
Volume          Pool  Volume size  FS     FS size       Free  Type    Mount point
———————————————————————————
/dev/rhel/root  rhel     50.00 GB  xfs   49.98 GB   42.70 GB  linear  /
/dev/rhel/swap  rhel     13.62 GB                             linear
/dev/rhel/kvm   rhel    250.00 GB  xfs  249.88 GB  249.88 GB  linear  /kvm
/dev/rhel/data  rhel    100.97 GB  xfs  100.92 GB  100.92 GB  linear
### volume 생성 확인 ###

/dev/sda1               500.00 MB  xfs  496.67 MB  358.68 MB  part    /boot
———————————————————————————
[root@rhel ~]# blkid /dev/rhel/data
/dev/rhel/data: UUID=”d9446cdd-f6b3-49f1-bdef-07d72134ff67″ TYPE=”xfs”
### volume의 block id 확인 ###
[root@rhel ~]# !! >> /etc/fstab
blkid /dev/rhel/data >> /etc/fstab
[root@rhel ~]# vim /etc/fstab
### 마지막에 아래 라인 추가.
UUID=”d9446cdd-f6b3-49f1-bdef-07d72134ff67″ /data       xfs defaults 0 0  ###  

[root@rhel ~]# mount -a
### fstab에 등록된것 mount ###

[root@rhel ~]# df -h
Filesystem             Size  Used Avail Use% Mounted on
/dev/mapper/rhel-root   50G   16G   35G  31% /
devtmpfs                20G     0   20G   0% /dev
tmpfs                   20G  156K   20G   1% /dev/shm
tmpfs                   20G   42M   20G   1% /run
tmpfs                   20G     0   20G   0% /sys/fs/cgroup
/dev/sda1              497M  189M  309M  38% /boot
/dev/mapper/rhel-kvm   250G   21G  230G   9% /kvm
/dev/mapper/rhel-data  101G   33M  101G   1% /data
### data volume mount 확인 ###

[root@rhel ~]# chown -R 36:36 /data
### ovirt 에서 읽을 수 있도록 오너쉽 변경 ###

[root@rhel ~]# vim /etc/exports.d/ovirt.exports
/iso *(rw)
/data *(rw)
### iso 와 data volume share 설정 ###

[root@rhel exports.d]# systemctl reload nfs-server.service
### nfs-server 설정 reload ###

[root@rhel exports.d]# exportfs
/iso            <world>
/data           <world>
### nfs share 확인 ###

자… 이제 domain을 추가 해주자…oVirt Engine Web Administration - Mozilla Firefox_003
Storage 텝에서 “New Domain” 클릭한다.


oVirt Engine Web Administration - Mozilla Firefox_002

이름, Domain Function (Data), Storage Type (NFS), Export Path( nfs-server:/directory )  를 입력 하고 “OK”를 눌러준다. path가 틀리거나 입력된 정보가 잘못되면 안만들어진다.

위와 같은 방법으로 ISO Domain도 추가 해주자.
VM 만들기.

vm tab 에서 NEW VM을 클릭해서 다음 칸을 체워준다.

oVirt Engine Web Administration - Mozilla Firefox_008


windows VM 은 intall 때 virtio 드라이버를 설치 해줘야지 된다. 안그럼 설치 할 디스크가 안보여서 설치 할 수가 없다.

[root@rhel ~]# yum install -y ovirt-guest-tools-iso
### ISO Domain 을 nfs share 해주는 nfs-server 에서 위 커맨드를 실행 한다. nfsovirt-guest-tools-iso 를 설치 windows 용 guest tool iso 파일을 다운 받는다. ###

Loaded plugins: fastestmirror, langpacks, product-id, subscription-manager
This system is not registered to Red Hat Subscription Management. You can use subscription-manager to register.
Loading mirror speeds from cached hostfile
Resolving Dependencies
–> Running transaction check
—> Package ovirt-guest-tools-iso.noarch 0:3.5-7 will be installed
–> Finished Dependency Resolution

Dependencies Resolved

===================================================================================================================================================================================================================
Package                                                        Arch                                            Version                                         Repository                                    Size
===================================================================================================================================================================================================================
Installing:
ovirt-guest-tools-iso                                          noarch                                          3.5-7                                           jdn                                           55 M

Transaction Summary
===================================================================================================================================================================================================================
Install  1 Package

Total download size: 55 M
Installed size: 103 M
Downloading packages:
ovirt-guest-tools-iso-3.5-7.noarch.rpm                                                                                                                                                      |  55 MB  00:00:01
Running transaction check
Running transaction test
Transaction test succeeded
Running transaction
Installing : ovirt-guest-tools-iso-3.5-7.noarch                                                                                                                                                              1/1
Verifying  : ovirt-guest-tools-iso-3.5-7.noarch                                                                                                                                                              1/1

Installed:
ovirt-guest-tools-iso.noarch 0:3.5-7

Complete!
[root@rhel ~]#
[root@rhel ~]# cd /usr/share/ovirt-guest-tools-iso/
[root@rhel ovirt-guest-tools-iso]# ls
### 위의 디렉토리 아래 oVirt-toolsSetup_3.5_7.iso 파일을 /iso 아래로 옮긴다. ###

oVirt-toolsSetup_3.5_7.iso  ovirt-tools-setup.iso
[root@rhel ovirt-guest-tools-iso]# cp -av oVirt-toolsSetup_3.5_7.iso /iso
`oVirt-toolsSetup_3.5_7.iso’ -> `/iso/oVirt-toolsSetup_3.5_7.iso’
[root@rhel ovirt-guest-tools-iso]# mv /iso/oVirt-toolsSetup_3.5_7.iso /iso/773375dc-b439-4450-ac30-4018e71d22d7/images/11111111-1111-1111-1111-111111111111/
[root@rhel ovirt-guest-tools-iso]# chown -R 36:36 /iso
### 옮긴 iso 파일을 ovirt 가 읽을 수 있도록 권한을 바꿔 준다. ###

다음 사진에서 change cdrom 을 눌러서 드라이버를 설치 할 수 있게 한다.oVirt Engine Web Administration - Mozilla Firefox_012
드라이버 로드‘ 를 눌러서 맞는 드라이버 경로로 찾아 가서 해당 드라이버 Red Hat VirtIO SCSI controler를 설치 해준다.win2012R2:1 - Press SHIFT+F12 to Release Cursor - Remote Viewer_014

win2012R2:1 - Press SHIFT+F12 to Release Cursor - Remote Viewer_006
설치 후 원래 설치 할 iso 파일로 바꿔주는걸 잊지 말자.

linux 일 경우 설치 후

[root@engine ~]# yum install -y epel-release
### epel repository 추가 ###

Loaded plugins: fastestmirror, langpacks, versionlock
Loading mirror speeds from cached hostfile
* base: mirror.oasis.onnetcorp.com
* extras: mirror.oasis.onnetcorp.com
* ovirt-3.6: http://www.gtlib.gatech.edu
* ovirt-3.6-epel: mirror.premi.st
* updates: mirror.oasis.onnetcorp.com
Resolving Dependencies
–> Running transaction check
—> Package epel-release.noarch 0:7-5 will be installed
–> Finished Dependency Resolution

Dependencies Resolved

===================================================================================================================================================================================================================
Package                                                 Arch                                              Version                                         Repository                                         Size
===================================================================================================================================================================================================================
Installing:
epel-release                                            noarch                                            7-5                                             extras                                             14 k

Transaction Summary
===================================================================================================================================================================================================================
Install  1 Package

Total download size: 14 k
Installed size: 24 k
Downloading packages:
epel-release-7-5.noarch.rpm                                                                                                                                                                 |  14 kB  00:00:00
Running transaction check
Running transaction test
Transaction test succeeded
Running transaction
Installing : epel-release-7-5.noarch                                                                                                                                                                         1/1
Verifying  : epel-release-7-5.noarch                                                                                                                                                                         1/1

Installed:
epel-release.noarch 0:7-5

Complete!
[root@engine ~]# yum install -y ovirt-guest-agent
### ovirt-guest-agent 를 설치 한다. ###

Loaded plugins: fastestmirror, langpacks, versionlock
Loading mirror speeds from cached hostfile
* base: mirror.oasis.onnetcorp.com
* epel: mirror.premi.st
* extras: mirror.oasis.onnetcorp.com
* ovirt-3.6: http://www.gtlib.gatech.edu
* ovirt-3.6-epel: mirror.premi.st
* updates: mirror.oasis.onnetcorp.com
Resolving Dependencies
–> Running transaction check
—> Package ovirt-guest-agent-common.noarch 0:1.0.11-1.el7 will be installed
–> Finished Dependency Resolution

Dependencies Resolved

===================================================================================================================================================================================================================
Package                                                        Arch                                         Version                                              Repository                                  Size
===================================================================================================================================================================================================================
Installing:
ovirt-guest-agent-common                                       noarch                                       1.0.11-1.el7                                         epel                                        61 k

Transaction Summary
===================================================================================================================================================================================================================
Install  1 Package

Total download size: 61 k
Installed size: 150 k
Downloading packages:
ovirt-guest-agent-common-1.0.11-1.el7.noarch.rpm                                                                                                                                            |  61 kB  00:00:00
Running transaction check
Running transaction test
Transaction test succeeded
Running transaction
Installing : ovirt-guest-agent-common-1.0.11-1.el7.noarch                                                                                                                                                    1/1
Created symlink from /etc/systemd/system/multi-user.target.wants/ovirt-guest-agent.service to /usr/lib/systemd/system/ovirt-guest-agent.service.
Verifying  : ovirt-guest-agent-common-1.0.11-1.el7.noarch                                                                                                                                                    1/1

Installed:
ovirt-guest-agent-common.noarch 0:1.0.11-1.el7

Complete!
[root@engine ~]# systemctl restart ovirt-guest-agent.service
### ovirt-guest-agent service restart 이걸 재시작 시켜 줘야지 적용이 된다. guest agent 를 설치 해줘야 ovirt admin console에서 vm 정보(ip, domain, memory … 등등) 이 제대로 나온다. ###

ovirt 3.6 install (2/3)

ovirt 3.6 install 2부

이번은 engine 에서부터 시작한다.

root@youngju:~# ssh rhel1 -l root
### DNAT 설정을 해주기 위해 nested-kvm 물리서버에 접속 한다. ###

Last login: Tue Dec 15 02:47:39 2015 from 192.168.21.180
[root@rhel ~]# ls
anaconda-ks.cfg       netstat-nat  다운로드  바탕화면  사진  음악
initial-setup-ks.cfg  공개         문서      비디오    서식
[root@rhel ~]# ip a
1: lo: <LOOPBACK,UP,LOWER_UP> mtu 65536 qdisc noqueue state UNKNOWN
link/loopback 00:00:00:00:00:00 brd 00:00:00:00:00:00
inet 127.0.0.1/8 scope host lo
valid_lft forever preferred_lft forever
inet6 ::1/128 scope host
valid_lft forever preferred_lft forever
2: enp8s0f0: <BROADCAST,MULTICAST,UP,LOWER_UP> mtu 1500 qdisc mq state UP qlen 1000
link/ether 00:19:99:83:e7:70 brd ff:ff:ff:ff:ff:ff
inet 192.168.x.80/24 brd 192.168.x.255 scope global enp8s0f0
valid_lft forever preferred_lft forever
inet 192.168.x.81/24 brd 192.168.x.255 scope global secondary enp8s0f0
valid_lft forever preferred_lft forever
inet 192.168.x.82/24 brd 192.168.x.255 scope global secondary enp8s0f0
valid_lft forever preferred_lft forever
inet6 fe80::219:99ff:fe83:e770/64 scope link
valid_lft forever preferred_lft forever
3: enp8s0f1: <NO-CARRIER,BROADCAST,MULTICAST,UP> mtu 1500 qdisc mq state DOWN qlen 1000
link/ether 00:19:99:83:e7:71 brd ff:ff:ff:ff:ff:ff
4: virbr0: <BROADCAST,MULTICAST,UP,LOWER_UP> mtu 1500 qdisc noqueue state UP
link/ether 52:54:00:31:da:5d brd ff:ff:ff:ff:ff:ff
inet 192.168.111.1/24 brd 192.168.111.255 scope global virbr0
valid_lft forever preferred_lft forever
5: virbr0-nic: <BROADCAST,MULTICAST> mtu 1500 qdisc pfifo_fast master virbr0 state DOWN qlen 500
link/ether 52:54:00:31:da:5d brd ff:ff:ff:ff:ff:ff
12: vnet0: <BROADCAST,MULTICAST,UP,LOWER_UP> mtu 1500 qdisc pfifo_fast master virbr0 state UNKNOWN qlen 5
00
link/ether fe:54:00:1d:3c:3d brd ff:ff:ff:ff:ff:ff
inet6 fe80::fc54:ff:fe1d:3c3d/64 scope link
valid_lft forever preferred_lft forever
13: vnet1: <BROADCAST,MULTICAST,UP,LOWER_UP> mtu 1500 qdisc pfifo_fast master virbr0 state UNKNOWN qlen 5
00
link/ether fe:54:00:4f:66:b8 brd ff:ff:ff:ff:ff:ff
inet6 fe80::fc54:ff:fe4f:66b8/64 scope link
valid_lft forever preferred_lft forever
[root@rhel ~]# nmcli con mod enp8s0f0 +ipv4.addresses 192.168.x.83/24
### secondary ip 를 하나 더 추가한다. ###

[root@rhel ~]# nmcli con up enp8s0f0
연결이 성공적으로 활성화되었습니다 (D-Bus 활성 경로: /org/freedesktop/NetworkManager/ActiveConnection/13)
[root@rhel ~]# ip a
1: lo: <LOOPBACK,UP,LOWER_UP> mtu 65536 qdisc noqueue state UNKNOWN
link/loopback 00:00:00:00:00:00 brd 00:00:00:00:00:00
inet 127.0.0.1/8 scope host lo
valid_lft forever preferred_lft forever
inet6 ::1/128 scope host
valid_lft forever preferred_lft forever
2: enp8s0f0: <BROADCAST,MULTICAST,UP,LOWER_UP> mtu 1500 qdisc mq state UP qlen 1000
link/ether 00:19:99:83:e7:70 brd ff:ff:ff:ff:ff:ff
inet 192.168.x.80/24 brd 192.168.x.255 scope global enp8s0f0
valid_lft forever preferred_lft forever
inet 192.168.x.81/24 brd 192.168.x.255 scope global secondary enp8s0f0
valid_lft forever preferred_lft forever
inet 192.168.x.82/24 brd 192.168.x.255 scope global secondary enp8s0f0
valid_lft forever preferred_lft forever
inet 192.168.x.83/24 brd 192.168.x.255 scope global secondary enp8s0f0
### ip 추가 확인 ###

valid_lft forever preferred_lft forever
inet6 fe80::219:99ff:fe83:e770/64 scope link tentative
valid_lft forever preferred_lft forever
3: enp8s0f1: <NO-CARRIER,BROADCAST,MULTICAST,UP> mtu 1500 qdisc mq state DOWN qlen 1000
link/ether 00:19:99:83:e7:71 brd ff:ff:ff:ff:ff:ff
4: virbr0: <BROADCAST,MULTICAST,UP,LOWER_UP> mtu 1500 qdisc noqueue state UP
link/ether 52:54:00:31:da:5d brd ff:ff:ff:ff:ff:ff
inet 192.168.111.1/24 brd 192.168.111.255 scope global virbr0
valid_lft forever preferred_lft forever
5: virbr0-nic: <BROADCAST,MULTICAST> mtu 1500 qdisc pfifo_fast master virbr0 state DOWN qlen 500
link/ether 52:54:00:31:da:5d brd ff:ff:ff:ff:ff:ff
12: vnet0: <BROADCAST,MULTICAST,UP,LOWER_UP> mtu 1500 qdisc pfifo_fast master virbr0 state UNKNOWN qlen 5
00
link/ether fe:54:00:1d:3c:3d brd ff:ff:ff:ff:ff:ff
inet6 fe80::fc54:ff:fe1d:3c3d/64 scope link
valid_lft forever preferred_lft forever
13: vnet1: <BROADCAST,MULTICAST,UP,LOWER_UP> mtu 1500 qdisc pfifo_fast master virbr0 state UNKNOWN qlen 5
00
link/ether fe:54:00:4f:66:b8 brd ff:ff:ff:ff:ff:ff
inet6 fe80::fc54:ff:fe4f:66b8/64 scope link
valid_lft forever preferred_lft forever
[root@rhel ~]# iptables -L -t nat -v
Chain PREROUTING (policy ACCEPT 4790 packets, 606K bytes)
pkts bytes target     prot opt in     out     source               destination
18  1080 DNAT       all  —  any    any     anywhere             rhel.swbc.test       to:192.168.111.1
0
8   504 DNAT       all  —  any    any     anywhere             rhel.swbc.test       to:192.168.111.1
1

Chain INPUT (policy ACCEPT 1567 packets, 297K bytes)
pkts bytes target     prot opt in     out     source               destination

Chain OUTPUT (policy ACCEPT 70536 packets, 5096K bytes)
pkts bytes target     prot opt in     out     source               destination

Chain POSTROUTING (policy ACCEPT 70560 packets, 5098K bytes)
pkts bytes target     prot opt in     out     source               destination
1609  115K MASQUERADE  all  —  any    enp8s0f0  192.168.111.0/24     anywhere
[root@rhel ~]# iptables -t nat -A PREROUTING -d 192.168.x.83/32 -j DNAT –to 192.168.111.12
### DNAT 설정 을 한다. 192.168.x.83 을 목적지로 오는 모든 패킷을 192.168.111.12(engine)으로 넘긴다. ###

[root@rhel ~]# iptables -t nat -L –line-number
Chain PREROUTING (policy ACCEPT)
num  target     prot opt source               destination
1    DNAT       all  —  anywhere             rhel.swbc.test       to:192.168.111.10
2    DNAT       all  —  anywhere             rhel.swbc.test       to:192.168.111.11
3    DNAT       all  —  anywhere             rhel.swbc.test       to:192.168.111.12

Chain INPUT (policy ACCEPT)
num  target     prot opt source               destination

Chain OUTPUT (policy ACCEPT)
num  target     prot opt source               destination

Chain POSTROUTING (policy ACCEPT)
num  target     prot opt source               destination
1    MASQUERADE  all  —  192.168.111.0/24     anywhere
[root@rhel ~]#
[root@rhel ~]#
[root@rhel ~]# service iptables save
iptables: Saving firewall rules to /etc/sysconfig/iptables:[  OK  ]
[root@rhel ~]#
[root@rhel ~]# ls
anaconda-ks.cfg       netstat-nat  다운로드  바탕화면  사진  음악
initial-setup-ks.cfg  공개         문서      비디오    서식
[root@rhel ~]#
[root@rhel ~]# logout
Connection to rhel1 closed.
root@youngju:~# ping rhel-engine
### DNAT 가 잘 적용 되엇는지 확인 ###

PING rhel-engine (192.168.x.83) 56(84) bytes of data.
64 bytes from rhel-engine (192.168.x.83): icmp_seq=1 ttl=61 time=71.0 ms
64 bytes from rhel-engine (192.168.x.83): icmp_seq=2 ttl=61 time=12.8 ms
^C
— rhel-engine ping statistics —
2 packets transmitted, 2 received, 0% packet loss, time 1001ms
rtt min/avg/max/mdev = 12.819/41.927/71.035/29.108 ms
root@youngju:~# ssh-copy-id rhel-engine
The authenticity of host ‘rhel-engine (192.168.x.83)’ can’t be established.
ECDSA key fingerprint is SHA256:Lnp8f7mxI2uuQ25eSXdKRfNdGDbJOlRcvVJc0888lwE.
ECDSA key fingerprint is MD5:e9:66:6a:6c:3d:78:62:47:ed:c0:fc:db:49:b4:81:52.
Are you sure you want to continue connecting (yes/no)? yes
/bin/ssh-copy-id: INFO: attempting to log in with the new key(s), to filter out any that are already inst
alled
/bin/ssh-copy-id: INFO: 1 key(s) remain to be installed — if you are prompted now it is to install the n
ew keys
root@rhel-engine’s password:

Number of key(s) added: 1

Now try logging into the machine, with:   “ssh ‘rhel-engine'”
and check to make sure that only the key(s) you wanted were added.

root@youngju:~# ssh rhel2
Last login: Tue Dec 15 03:09:11 2015 from 192.168.21.180
[root@hosted-engine ~]# ip a
1: lo: <LOOPBACK,UP,LOWER_UP> mtu 65536 qdisc noqueue state UNKNOWN
link/loopback 00:00:00:00:00:00 brd 00:00:00:00:00:00
inet 127.0.0.1/8 scope host lo
valid_lft forever preferred_lft forever
inet6 ::1/128 scope host
valid_lft forever preferred_lft forever
2: ens8: <BROADCAST,MULTICAST,UP,LOWER_UP> mtu 1500 qdisc pfifo_fast master ovirtmgmt state UP qlen 1000
link/ether 52:54:00:4f:66:b8 brd ff:ff:ff:ff:ff:ff
inet6 fe80::5054:ff:fe4f:66b8/64 scope link
valid_lft forever preferred_lft forever
3: bond0: <BROADCAST,MULTICAST,MASTER> mtu 1500 qdisc noop state DOWN
link/ether 46:5c:b4:81:ef:3b brd ff:ff:ff:ff:ff:ff
4: ;vdsmdummy;: <BROADCAST,MULTICAST> mtu 1500 qdisc noop state DOWN
link/ether 22:57:da:f9:f1:a6 brd ff:ff:ff:ff:ff:ff
5: ovirtmgmt: <BROADCAST,MULTICAST,UP,LOWER_UP> mtu 1500 qdisc noqueue state UP
link/ether 52:54:00:4f:66:b8 brd ff:ff:ff:ff:ff:ff
inet 192.168.111.10/24 brd 192.168.111.255 scope global ovirtmgmt
valid_lft forever preferred_lft forever
7: vnet0: <BROADCAST,MULTICAST,UP,LOWER_UP> mtu 1500 qdisc pfifo_fast master ovirtmgmt state UNKNOWN qlen
500
link/ether fe:16:3e:68:97:c4 brd ff:ff:ff:ff:ff:ff
inet6 fe80::fc16:3eff:fe68:97c4/64 scope link
valid_lft forever preferred_lft forever
[root@hosted-engine ~]# scp /etc/hosts engine:/etc/
### hosted-engine 에 있는 hosts file을 engine 에도 넣는다. ###

The authenticity of host ‘engine (192.168.111.12)’ can’t be established.
ECDSA key fingerprint is e9:66:6a:6c:3d:78:62:47:ed:c0:fc:db:49:b4:81:52.
Are you sure you want to continue connecting (yes/no)? yes
Warning: Permanently added ‘engine,192.168.111.12’ (ECDSA) to the list of known hosts.
root@engine’s password:
Permission denied, please try again.
root@engine’s password:
hosts                                                                  100%  341     0.3KB/s   00:00
[root@hosted-engine ~]# logout
Connection to rhel2 closed.
root@youngju:~# ssh rhel-engine
Last failed login: Tue Dec 15 04:42:45 KST 2015 from 192.168.111.10 on ssh:notty
There was 1 failed login attempt since the last successful login.
Last login: Tue Dec 15 04:42:14 2015 from 192.168.21.180
[root@engine ~]# ls
anaconda-ks.cfg
[root@engine ~]# ping 8.8.8.8
PING 8.8.8.8 (8.8.8.8) 56(84) bytes of data.
64 bytes from 8.8.8.8: icmp_seq=1 ttl=41 time=76.8 ms
^C
— 8.8.8.8 ping statistics —
1 packets transmitted, 1 received, 0% packet loss, time 0ms
rtt min/avg/max/mdev = 76.822/76.822/76.822/0.000 ms
[root@engine ~]#
[root@engine ~]# ls
anaconda-ks.cfg
[root@engine ~]# pwd
/root
[root@engine ~]# yum install http://resources.ovirt.org/pub/yum-repo/ovirt-release36.rpm
### ovirt-3.6 yum repository 추가. ###

Loaded plugins: fastestmirror, langpacks
ovirt-release36.rpm                                                               |  13 kB  00:00:00
Examining /var/tmp/yum-root-ryjRUK/ovirt-release36.rpm: ovirt-release36-002-2.noarch
Marking /var/tmp/yum-root-ryjRUK/ovirt-release36.rpm to be installed
Resolving Dependencies
–> Running transaction check
Transaction test succeeded
### 생략 … ###

Installed:
ovirt-release36.noarch 0:002-2

Complete!
[root@engine ~]# yum update -y && yum install -y ovirt-engine-setup && reboot
### update 및 ovirt-engine 설치 후 reboot … ###

Loaded plugins: fastestmirror, langpacks
ovirt-3.6                                                                         | 2.9 kB  00:00:00
ovirt-3.6-epel/x86_64/metalink                                                    | 4.7 kB  00:00:00
### 생략 … ###

Complete!
Connection to rhel-engine closed by remote host.
Connection to rhel-engine closed.
255 root@youngju:~# ssh rhel-engine
ssh: connect to host rhel-engine port 22: No route to host
255 root@youngju:~# ping rhel-engine
PING rhel-engine (192.168.x.83) 56(84) bytes of data.
From rhel-engine (192.168.x.83) icmp_seq=1 Destination Host Unreachable
From rhel-engine (192.168.x.83) icmp_seq=2 Destination Host Unreachable
From rhel-engine (192.168.x.83) icmp_seq=3 Destination Host Unreachable
64 bytes from rhel-engine (192.168.x.83): icmp_seq=92 ttl=61 time=859 ms
64 bytes from rhel-engine (192.168.x.83): icmp_seq=93 ttl=61 time=11.2 ms
64 bytes from rhel-engine (192.168.x.83): icmp_seq=94 ttl=61 time=14.2 ms
64 bytes from rhel-engine (192.168.x.83): icmp_seq=95 ttl=61 time=13.4 ms
64 bytes from rhel-engine (192.168.x.83): icmp_seq=96 ttl=61 time=11.3 ms
^C
— rhel-engine ping statistics —
96 packets transmitted, 5 received, +91 errors, 94% packet loss, time 95030ms
rtt min/avg/max/mdev = 11.257/181.922/859.377/338.729 ms, pipe 4
root@youngju:~#
root@youngju:~# ssh rhel-engine
Last login: Tue Dec 15 04:42:52 2015 from 192.168.21.180
[root@engine ~]# cat /etc/hosts
127.0.0.1   localhost localhost.localdomain localhost4 localhost4.localdomain4
::1         localhost localhost.localdomain localhost6 localhost6.localdomain6
192.168.111.10    hosted-engine hosted-engine.test.dom
192.168.111.11    host1 host1.test.dom
192.168.111.12    ovirt-engine  engine engine.test.dom
192.168.111.1     nested-kvm kvm
[root@engine ~]# engine-setup
### engine-setup 을 한다. ###

[ INFO  ] Stage: Initializing
[ INFO  ] Stage: Environment setup
Configuration files: [‘/etc/ovirt-engine-setup.conf.d/10-packaging-jboss.conf’, ‘/etc/ovirt-eng
ine-setup.conf.d/10-packaging.conf’]
Log file: /var/log/ovirt-engine/setup/ovirt-engine-setup-20151215055619-0j8tpt.log
Version: otopi-1.4.0 (otopi-1.4.0-1.el7.centos)
[ INFO  ] Stage: Environment packages setup
[ INFO  ] Stage: Programs detection
[ INFO  ] Stage: Environment setup
[ INFO  ] Stage: Environment customization

–== PRODUCT OPTIONS ==–

Configure Engine on this host (Yes, No) [Yes]:
Configure VM Console Proxy on this host (Yes, No) [Yes]:
Configure WebSocket Proxy on this host (Yes, No) [Yes]:

–== PACKAGES ==–

[ INFO  ] Checking for product updates…
[ INFO  ] No product updates found

–== ALL IN ONE CONFIGURATION ==–

–== NETWORK CONFIGURATION ==–

Host fully qualified DNS name of this server [engine.test.dom]:
[WARNING] Failed to resolve engine.test.dom using DNS, it can be resolved only locally
### 여기 warning 뜨는 이유는 dns쿼리 안되서 그런건데 신경안써도 된다. ###

Setup can automatically configure the firewall on this system.
Note: automatic configuration of the firewall may overwrite current settings.
Do you want Setup to configure the firewall? (Yes, No) [Yes]:
### firewall 자동으로 설정 할것인가. ###

[ INFO  ] firewalld will be configured as firewall manager.
[WARNING] Failed to resolve engine.test.dom using DNS, it can be resolved only locally
[WARNING] Failed to resolve engine.test.dom using DNS, it can be resolved only locally

–== DATABASE CONFIGURATION ==–

Where is the Engine database located? (Local, Remote) [Local]:
### engine database 위치를 어디로 할것인가? ###

Setup can configure the local postgresql server automatically for the engine to run. This may c
onflict with existing applications.
Would you like Setup to automatically configure postgresql and create Engine database, or prefe
r to perform that manually? (Automatic, Manual) [Automatic]:
### postgresql database 를 자동적으로 설치 및 설정 할것인가? 여기서 manual로 설정 할 시 oracle 등 다른 DB에도 넣을 수 가 있다. (해보진 않았는데 메뉴얼에 그리 나와잇더라) ###

–== OVIRT ENGINE CONFIGURATION ==–

Application mode (Virt, Gluster, Both) [Both]:
### 뭔차이가 있는진 모르겟는데 그냥 둘다 쓰는걸로 하자 Both ###

Engine admin password:
### 아까 설정한 admin portal 암호 ###
Confirm engine admin password:

–== STORAGE CONFIGURATION ==–

Default SAN wipe after delete (Yes, No) [No]:
### 이거 3.5 에는 없던 설정인데 뭔진 모르겟다. 일단 뭐 지운다니까 기본값인 NO!! ###

–== PKI CONFIGURATION ==–

Organization name for certificate [test.dom]:
### 증명서의 조직명을 지정한다. 잘 모르니 그냥 기본값으로 하자. ㅎ###

–== APACHE CONFIGURATION ==–

Setup can configure apache to use SSL using a certificate issued from the internal CA.
Do you wish Setup to configure that, or prefer to perform that manually? (Automatic, Manual) [Automatic]:
### 내부 CA 인증서를 이용해 SSL 설정을 하겟는가? ###

Setup can configure the default page of the web server to present the application home page. Th
is may conflict with existing applications.
Do you wish to set the application as the default page of the web server? (Yes, No) [Yes]:
### ovirt web page를 기본 page로 설정 하겟는가? ###

–== SYSTEM CONFIGURATION ==–

Configure an NFS share on this server to be used as an ISO Domain? (Yes, No) [Yes]: no
### ISO domain을 만들겟는가? ###

–== MISC CONFIGURATION ==–

–== END OF CONFIGURATION ==–

[ INFO  ] Stage: Setup validation
[WARNING] Less than 16384MB of memory is available

–== CONFIGURATION PREVIEW ==–

Application mode                        : both
Default SAN wipe after delete           : False
Firewall manager                        : firewalld
Update Firewall                         : True
Host FQDN                               : engine.test.dom
Engine database secured connection      : False
Engine database host                    : localhost
Engine database user name               : engine
Engine database name                    : engine
Engine database port                    : 5432
Engine database host name validation    : False
Engine installation                     : True
PKI organization                        : test.dom
Configure local Engine database         : True
Set application as default page         : True
Configure Apache SSL                    : True
Configure VMConsole Proxy               : True
Engine Host FQDN                        : engine.test.dom
Configure WebSocket Proxy               : True

Please confirm installation settings (OK, Cancel) [OK]:
[ INFO  ] Stage: Transaction setup
[ INFO  ] Stopping engine service
[ INFO  ] Stopping ovirt-fence-kdump-listener service
[ INFO  ] Stopping websocket-proxy service
[ INFO  ] Stage: Misc configuration
[ INFO  ] Stage: Package installation
[ INFO  ] Stage: Misc configuration
[ INFO  ] Initializing PostgreSQL
[ INFO  ] Creating PostgreSQL ‘engine’ database
[ INFO  ] Configuring PostgreSQL
[ INFO  ] Creating/refreshing Engine database schema
[ INFO  ] Creating/refreshing Engine ‘internal’ domain database schema
[ INFO  ] Upgrading CA
[ INFO  ] Creating CA
[ INFO  ] Setting up ovirt-vmconsole proxy helper PKI artifacts
[ INFO  ] Setting up ovirt-vmconsole SSH PKI artifacts
[ INFO  ] Configuring WebSocket Proxy
[ INFO  ] Generating post install configuration file ‘/etc/ovirt-engine-setup.conf.d/20-setup-ovirt-post.
conf’
[ INFO  ] Stage: Transaction commit
[ INFO  ] Stage: Closing up

–== SUMMARY ==–

[WARNING] Less than 16384MB of memory is available
SSH fingerprint: 03:fc:b5:2b:3a:d4:8b:49:01:d8:e7:1a:c0:25:8e:2d
Internal CA 6E:67:77:FA:2E:FE:8C:5D:F9:0A:3A:EF:E7:97:31:4E:B2:23:6F8
Note! If you want to gather statistical information you can install Reports and/or DWH:
http://www.ovirt.org/Ovirt_DWH
http://www.ovirt.org/Ovirt_Reports
Web access is enabled at:
http://engine.test.dom:80/ovirt-engine
https://engine.test.dom:443/ovirt-engine
Please use the user ‘admin@internal’ and password specified in order to login

–== END OF SUMMARY ==–

[ INFO  ] Starting engine service
[ INFO  ] Restarting httpd
[ INFO  ] Restarting ovirt-vmconsole proxy service
[ INFO  ] Stage: Clean up
Log file is located at /var/log/ovirt-engine/setup/ovirt-engine-setup-20151215055619-0j8tpt.log
[ INFO  ] Generating answer file ‘/var/lib/ovirt-engine/setup/answers/20151215060801-setup.conf’
[ INFO  ] Stage: Pre-termination
[ INFO  ] Stage: Termination
[ INFO  ] Execution of setup completed successfully
### 정상적으로 install 이 완료 되엇다. ###

[root@engine ~]#

### engine setup 을 완료 하고 다시 hosted-engine 서버로 돌아간다. ###

[ INFO  ] Engine is still unreachable
oVirt-Engine health status page is not yet reachable.

The VM has been rebooted.
To continue please install oVirt-Engine in the VM
(Follow http://www.ovirt.org/Quick_Start_Guide for more info).

Make a selection from the options below:
(1) Continue setup – oVirt-Engine installation is ready and ovirt-engine service is up
(2) Power off and restart the VM
(3) Abort setup
(4) Destroy VM and abort setup

(1, 2, 3, 4)[1]:
### ovirt engine setup 이 끝난 후 1 을 입력한다. ###

Checking for oVirt-Engine status at engine.test.dom…
[ INFO  ] Engine replied: DB Up!Welcome to Health Status!
[ INFO  ] Connecting to the Engine
Enter the name of the cluster to which you want to add the host (Default) [Default]:
### hosted-engine 을 ovirt web console 의 defualt cluster 에 등록한다. ###

[ INFO  ] Waiting for the host to become operational in the engine. This may take several minutes…
[ INFO  ] Still waiting for VDSM host to become operational…
[ INFO  ] The VDSM Host is now operational
[ INFO  ] Saving hosted-engine configuration on the shared storage domain
Please shutdown the VM allowing the system to launch it as a monitored service.
The system will wait until the VM is down.
[ INFO  ] Enabling and starting HA services
Hosted Engine successfully set up
[ INFO  ] Stage: Clean up
[ INFO  ] Generating answer file ‘/var/lib/ovirt-hosted-engine-setup/answers/answers-20151215061820.conf’
[ INFO  ] Generating answer file ‘/etc/ovirt-hosted-engine/answers.conf’
[ INFO  ] Stage: Pre-termination
[ INFO  ] Stage: Termination
### 정상적으로 hosted-engine 이 설치 되었다. ###

[root@hosted-engine ~]# iptables -L
### messages 파일에서 xtables 의 selinux 권한 거부가 떠서 이걸 살펴 봤는데 일단 iptables 에는 등록이 잘 되엇다… 일단 selinux permissive 로 해둠…ㅇㅇ ..###

Chain INPUT (policy ACCEPT)
target     prot opt source               destination
ACCEPT     all  —  anywhere             anywhere             state RELATED,ESTABLISHED
ACCEPT     icmp —  anywhere             anywhere
ACCEPT     all  —  anywhere             anywhere
ACCEPT     tcp  —  anywhere             anywhere             tcp dpt:54321
ACCEPT     tcp  —  anywhere             anywhere             tcp dpt:sunrpc
ACCEPT     udp  —  anywhere             anywhere             udp dpt:sunrpc
ACCEPT     tcp  —  anywhere             anywhere             tcp dpt:ssh
ACCEPT     udp  —  anywhere             anywhere             udp dpt:snmp
ACCEPT     tcp  —  anywhere             anywhere             tcp dpt:16514
ACCEPT     tcp  —  anywhere             anywhere             multiport dports rockwell-csp2
ACCEPT     tcp  —  anywhere             anywhere             multiport dports rfb:6923
ACCEPT     tcp  —  anywhere             anywhere             multiport dports 49152:49216
REJECT     all  —  anywhere             anywhere             reject-with icmp-host-prohibited

Chain FORWARD (policy ACCEPT)
target     prot opt source               destination
REJECT     all  —  anywhere             anywhere             PHYSDEV match ! –physdev-is-bridged reject
-with icmp-host-prohibited

Chain OUTPUT (policy ACCEPT)
target     prot opt source               destination
[root@hosted-engine ~]# systemctl status firewalld
firewalld.service – firewalld – dynamic firewall daemon
Loaded: loaded (/usr/lib/systemd/system/firewalld.service; disabled)
Active: inactive (dead)

12월 15 00:19:10 hosted-engine systemd[1]: Starting firewalld – dynamic firewall daemon…
12월 15 00:19:11 hosted-engine systemd[1]: Started firewalld – dynamic firewall daemon.
12월 15 03:05:21 hosted-engine.test.dom systemd[1]: Stopping firewalld – dynamic firewall daemon…
12월 15 03:05:22 hosted-engine.test.dom systemd[1]: Stopped firewalld – dynamic firewall daemon.
12월 15 03:08:15 hosted-engine.test.dom systemd[1]: Stopped firewalld – dynamic firewall daemon.
12월 15 06:17:17 hosted-engine.test.dom systemd[1]: Stopped firewalld – dynamic firewall daemon.
[root@hosted-engine ~]# systemctl status iptables
iptables.service – IPv4 firewall with iptables
Loaded: loaded (/usr/lib/systemd/system/iptables.service; enabled)
Active: active (exited) since 화 2015-12-15 06:17:18 KST; 2min 0s ago
Main PID: 29595 (code=exited, status=0/SUCCESS)
CGroup: /system.slice/iptables.service

12월 15 06:17:18 hosted-engine.test.dom iptables.init[29595]: iptables: Applying firewall rules: [ … ]
12월 15 06:17:18 hosted-engine.test.dom systemd[1]: Started IPv4 firewall with iptables.
12월 15 06:17:18 hosted-engine.test.dom systemd[1]: [/usr/lib/systemd/system/iptables.service:4] U…it’
12월 15 06:17:21 hosted-engine.test.dom systemd[1]: [/usr/lib/systemd/system/iptables.service:4] U…it’
12월 15 06:18:19 hosted-engine.test.dom systemd[1]: [/usr/lib/systemd/system/iptables.service:4] U…it’
Hint: Some lines were ellipsized, use -l to show in full.
[root@hosted-engine ~]#
You have new mail in /var/spool/mail/root
root@hosted-engine ~]#
[root@hosted-engine ~]# getenforce
Enforcing
[root@hosted-engine ~]# setenforce 0
[root@hosted-engine ~]# hosted-engine –vm-status
### ovirt-engine 잘 올라와 있는지 확인한다. 지금의 상태가 정상적인 상태 이다. ###

–== Host 1 status ==–

Status up-to-date                  : True
Hostname                               : hosted-engine.test.dom
Host ID                                    : 1
Engine status                         : {“health”: “good”, “vm”: “up”, “detail”: “up”}
Score                                       : 3400
stopped                                   : False
Local maintenance               : False
crc32                                        : a17de4ee
Host timestamp                      : 26296

웹브라우저로 http://engine 으로  들어가보자

Ovirt-Engine - Mozilla Firefox_031


관리 포탈을 클릭하고 보안 예외 확인 추가…

아래 언어 설정이 있는데 예전 3.5 초기에는 한국어로 설정 하면 버그가 있었다.

oVirt Engine 웹 관리 - Mozilla Firefox_033


사용자 이름에 admin

암호에는 아까 설정한 admin portal 암호를 입력하자.

oVirt Engine 웹 관리 - Mozilla Firefox_034


로그인 초기화면이다.

3.5 까지는 가상머신 텝에 ovirt-engine이 있었는데 3.6 부터는 사라졌다.

하긴… 있어도 뭐 관리도 불가능 했고 별로 할게 없었는데 오히려 잘한것 같기도 하다.

여기까지 해도 아직 가상머신은 만들 수 없다….

master domain 설정 및 몇가지 더 해줘야지 비로소 만들 수가 있다.

그 건 다음 이시간에 ㅎ

포스팅 밤새 했더니 졸립다.

ovirt 3.6 install (1/3)

Ovirt 3.6 install

Nested kvm 설정도 했으니 Ovirt 3.6 을 깔아보자.

일단 준비물.

1. server or ovirt 올릴 VM or pc

2. hostname ip addres

3. domain name

4. iso file

Centos 7.iso

Window 2012r2.iso

5. internet도 되야함.

뭐 대충 이정도…? 더 있으면 쓰다가 추가함.

Ovirt hosted engine 방식 으로 install 한다.

yum repository install  


$ yum install http://resources.ovirt.org/pub/yum-repo/ovirt-release36.rpm

항상 뭘 하건 간에 log를 함께 보면서 하면 좋다. 난 message와 함께 vdsm log도 함께 본다


이렇게 byobu로 보면 좋음 ㅋ

youngju.lee@youngju.lee (192.168.171.7) - byobu_030


다음부터 스크립트를 뜬것을 토대로 설명함.

byobu에 shift + F7 을 누르면 현재 창에서의 모든 history를 파일형태로 export 할 수 있다. 그냥 script 명령어로 스크립트를 뜨면 백스페이스던 뭐던 이상한 알아보기 힘들게 특수문자가 섞여 있는데 이건 그런거 없이 그냥 terminal 에 있는 것들만 내보낼 수 있음 ㅋ 좋음.

​[root@hosted-engine ~]#
[root@hosted-engine ~]# yum install http://resources.ovirt.org/pub/yum-repo/ovirt-release36.rpm
### ovirt 3.6 repository install ##

Loaded plugins: fastestmirror, langpacks
[root@hosted-engine ~]# yum install -y epel-release
### epel repository install ###

[root@hosted-engine ~]# yum install -y ovirt-hosted-engine-setup screen system-storage-manager
### ovirt hosted-engine screen system-storage-manager install
screen은 행여 network 가 끊어질 것을 대비하여 ovirt manual 에서도 사용하는것을 권장 하고 있다.
system-storage-manager 는 linux LVM을 보다 편하게 쉽게 할 수 있는 툴이다. 짱임 ㅋ

Loaded plugins: fastestmirror, langpacks
epel/x86_64/metalink                                                              | 4.7 kB  00:00:00
epel                                                                              | 4.3 kB  00:00:00
(1/3): epel/x86_64/group_gz                                                       | 169 kB  00:00:00
(2/3): epel/x86_64/updateinfo                                                     | 432 kB  00:00:00
(3/3): epel/x86_64/primary_db                                                     | 3.7 MB  00:00:00
Loading mirror speeds from cached hostfile
* base: data.nicehosting.co.kr
* epel: mirror.premi.st
* extras: data.nicehosting.co.kr
* ovirt-3.6: ftp.nluug.nl
* ovirt-3.6-epel: mirror.premi.st
* updates: data.nicehosting.co.kr
Resolving Dependencies
–> Running transaction check
—> Package ovirt-hosted-engine-setup.noarch 0:1.3.0-1.el7.centos will be installed
### 생략 ###

yum install -y ovirt-hosted-engine-setup screen system-storage-manager
### ovirt hosted-engine screen system-storage-manager install
screen은 행여 network 가 끊어질 것을 대비하여 ovirt manual 에서도 사용하는것을 권장 하고 있다.
system-storage-manager 는 linux LVM을 보다 편하게 쉽게 할 수 있는 툴이다. 짱임 ㅋ
 

Dependency Updated:
glusterfs.x86_64 0:3.7.6-1.el7 glusterfs-api.x86_64 0:3.7.6-1.el7 glusterfs-libs.x86_64 0:3.7.6-1.el7

Replaced:
qemu-img.x86_64 10:1.5.3-86.el7_1.8                    qemu-kvm.x86_64 10:1.5.3-86.el7_1.8
qemu-kvm-common.x86_64 10:1.5.3-86.el7_1.8

Complete!
[root@hosted-engine ~]# vim /etc/hosts
### hosts file 수정 … FQND 방식으로 domain name 까지 붙여서 넣어주자. ###
예) 192.168.111.11     host1.test.dom host1

[root@hosted-engine ~]# cat /etc/hosts
127.0.0.1   localhost localhost.localdomain localhost4 localhost4.localdomain4
::1         localhost localhost.localdomain localhost6 localhost6.localdomain6
192.168.111.10    hosted-engine hosted-engine.test.dom
192.168.111.11    host1 host1.test.dom
192.168.111.12    ovirt-engine  engine engine.test.dom
[root@hosted-engine ~]# scp /etc/hosts host1:/etc/
### host1 의 hosts 파일도 같게 맞춰 주자 ###

The authenticity of host ‘host1 (192.168.111.11)’ can’t be established.
ECDSA key fingerprint is be:54:41:2d:27:a0:00:a0:54:e6:42:c7:1a:69:b7:d0.
Are you sure you want to continue connecting (yes/no)? yes
Warning: Permanently added ‘host1,192.168.111.11’ (ECDSA) to the list of known hosts.
root@host1’s password:
hosts                                                                  100%  253     0.3KB/s   00:00
[root@hosted-engine ~]# date
### time 확인 ### 독립된 환경에서는 ntp server를 따로 올려줘야 한다. 이건 나중에 포스팅 ㅋ ###

2015. 12. 15. (화) 02:46:24 KST
[root@hosted-engine ~]# timedatectl
### rhel7 부터는 시간을 이렇게 고급적이게 확인 할 수있다. ㅋㅋㅋ ###

Local time: 화 2015-12-15 02:46:30 KST
Universal time: 월 2015-12-14 17:46:30 UTC
RTC time: 월 2015-12-14 17:46:30
Timezone: Asia/Seoul (KST, +0900)
NTP enabled: yes
NTP synchronized: yes
RTC in local TZ: no
DST active: n/a
[root@hosted-engine ~]# pwd
/root
[root@hosted-engine ~]# df
Filesystem           1K-blocks    Used Available Use% Mounted on
/dev/mapper/ssm-root  41922560 4172320  37750240  10% /
devtmpfs               8124500       0   8124500   0% /dev
tmpfs                  8134132      80   8134052   1% /dev/shm
tmpfs                  8134132    9084   8125048   1% /run
tmpfs                  8134132       0   8134132   0% /sys/fs/cgroup
/dev/vda1               508588  171760    336828  34% /boot

[root@hosted-engine ~]# cd /etc/exports.d/
[root@hosted-engine exports.d]# ls
[root@hosted-engine exports.d]#
[root@hosted-engine exports.d]#
[root@hosted-engine exports.d]# vim ovirt36.exports
### nfs 설정 해준다. ###
/engine *(rw)

[root@hosted-engine exports.d]# ls
ovirt36.exports
[root@hosted-engine exports.d]# pwd
/etc/exports.d
[root@hosted-engine exports.d]#
[root@hosted-engine exports.d]#
[root@hosted-engine exports.d]# mkdir /engine
[root@hosted-engine exports.d]# pwd
/etc/exports.d
[root@hosted-engine exports.d]# df
Filesystem           1K-blocks    Used Available Use% Mounted on
/dev/mapper/ssm-root  41922560 4172440  37750120  10% /
devtmpfs               8124500       0   8124500   0% /dev
tmpfs                  8134132      80   8134052   1% /dev/shm
tmpfs                  8134132    9060   8125072   1% /run
tmpfs                  8134132       0   8134132   0% /sys/fs/cgroup
/dev/vda1               508588  171760    336828  34% /boot

[root@hosted-engine exports.d]# ssm list
### LVM 확인 … 없으니까 파티션을 만들어 주자. ###

———————————————————-
Device        Free      Used      Total  Pool  Mount point
———————————————————-
/dev/vda                      100.00 GB        PARTITIONED
/dev/vda1                     500.00 MB        /boot
/dev/vda2  4.00 MB  44.00 GB   44.00 GB  ssm
———————————————————-
————————————————
Pool  Type  Devices     Free      Used     Total
————————————————
ssm   lvm   1        4.00 MB  44.00 GB  44.00 GB
————————————————
——————————————————————————–
Volume         Pool  Volume size  FS     FS size       Free  Type    Mount point
——————————————————————————–
/dev/ssm/root  ssm      40.00 GB  xfs   39.98 GB   36.20 GB  linear  /
/dev/ssm/swap  ssm       4.00 GB                             linear
/dev/vda1              500.00 MB  xfs  496.67 MB  328.96 MB  part    /boot
——————————————————————————–
[root@hosted-engine exports.d]# fdisk /dev/vda
Welcome to fdisk (util-linux 2.23.2).

Changes will remain in memory only, until you decide to write them.
Be careful before using the write command.

Command (m for help): p

Disk /dev/vda: 107.4 GB, 107374182400 bytes, 209715200 sectors
Units = sectors of 1 * 512 = 512 bytes
Sector size (logical/physical): 512 bytes / 512 bytes
I/O size (minimum/optimal): 512 bytes / 512 bytes
Disk label type: dos
Disk identifier: 0x000b435d

Device Boot      Start         End      Blocks   Id  System
/dev/vda1   *        2048     1026047      512000   83  Linux
/dev/vda2         1026048    93306879    46140416   8e  Linux LVM

Command (m for help): n
Partition type:
p   primary (2 primary, 0 extended, 2 free)
e   extended
Select (default p):
Using default response p
Partition number (3,4, default 3):
First sector (93306880-209715199, default 93306880):
Using default value 93306880
Last sector, +sectors or +size{K,M,G} (93306880-209715199, default 209715199):
Using default value 209715199
Partition 3 of type Linux and of size 55.5 GiB is set

Command (m for help):
Command (m for help): p

Disk /dev/vda: 107.4 GB, 107374182400 bytes, 209715200 sectors
Units = sectors of 1 * 512 = 512 bytes
Sector size (logical/physical): 512 bytes / 512 bytes
I/O size (minimum/optimal): 512 bytes / 512 bytes
Disk label type: dos
Disk identifier: 0x000b435d

Device Boot      Start         End      Blocks   Id  System
/dev/vda1   *        2048     1026047      512000   83  Linux
/dev/vda2         1026048    93306879    46140416   8e  Linux LVM
/dev/vda3        93306880   209715199    58204160   83  Linux

Command (m for help): w
The partition table has been altered!

Calling ioctl() to re-read partition table.

WARNING: Re-reading the partition table failed with error 16: 장치나 자원이 동작 중.
The kernel still uses the old table. The new table will be used at
the next reboot or after you run partprobe(8) or kpartx(8)
Syncing disks.
[root@hosted-engine exports.d]#
[root@hosted-engine exports.d]#
[root@hosted-engine exports.d]#
[root@hosted-engine exports.d]#
[root@hosted-engine exports.d]# partprobe
### 현재 수정한 disk 가 root 파티션을 마운트 하고 있으면 이 명령어로 kernel 이 새로운 table 을 가질 수 있게 해준다. ###

[root@hosted-engine exports.d]# ssm list
———————————————————-
Device        Free      Used      Total  Pool  Mount point
———————————————————-
/dev/vda                      100.00 GB        PARTITIONED
/dev/vda1                     500.00 MB        /boot
/dev/vda2  4.00 MB  44.00 GB   44.00 GB  ssm
/dev/vda3                      55.51 GB
———————————————————-
————————————————
Pool  Type  Devices     Free      Used     Total
————————————————
ssm   lvm   1        4.00 MB  44.00 GB  44.00 GB
————————————————
——————————————————————————–
Volume         Pool  Volume size  FS     FS size       Free  Type    Mount point
——————————————————————————–
/dev/ssm/root  ssm      40.00 GB  xfs   39.98 GB   35.94 GB  linear  /
/dev/ssm/swap  ssm       4.00 GB                             linear
/dev/vda1              500.00 MB  xfs  496.67 MB  328.96 MB  part    /boot
——————————————————————————–
[root@hosted-engine exports.d]# ssm add -p ssm /dev/vda3
### PV 추가 해준다. ###

Physical volume “/dev/vda3” successfully created
Volume group “ssm” successfully extended
[root@hosted-engine exports.d]# ssm create -p ssm -n engine -s 30g –fs xfs
### LV 를 만든다. ###

Logical volume “engine” created.
meta-data=/dev/ssm/engine        isize=256    agcount=4, agsize=1966080 blks
=                       sectsz=512   attr=2, projid32bit=1
=                       crc=0        finobt=0
data     =                       bsize=4096   blocks=7864320, imaxpct=25
=                       sunit=0      swidth=0 blks
naming   =version 2              bsize=4096   ascii-ci=0 ftype=0
log      =internal log           bsize=4096   blocks=3840, version=2
=                       sectsz=512   sunit=0 blks, lazy-count=1
realtime =none                   extsz=4096   blocks=0, rtextents=0
[root@hosted-engine exports.d]# ssm list
### 30GB 의 engine 이라는 이름의 볼륨이 만들어 진것을 확인 할 수 있다. ###

———————————————————–
Device         Free      Used      Total  Pool  Mount point
———————————————————–
/dev/vda                       100.00 GB        PARTITIONED
/dev/vda1                      500.00 MB        /boot
/dev/vda2   4.00 MB  44.00 GB   44.00 GB  ssm
/dev/vda3  25.50 GB  30.00 GB   55.51 GB  ssm
———————————————————–
————————————————-
Pool  Type  Devices      Free      Used     Total
————————————————-
ssm   lvm   2        25.51 GB  74.00 GB  99.50 GB
————————————————-
———————————————————————————-
Volume           Pool  Volume size  FS     FS size       Free  Type    Mount point
———————————————————————————-
/dev/ssm/root    ssm      40.00 GB  xfs   39.98 GB   35.94 GB  linear  /
/dev/ssm/swap    ssm       4.00 GB                             linear
/dev/ssm/engine  ssm      30.00 GB  xfs   29.99 GB   29.99 GB  linear
/dev/vda1                500.00 MB  xfs  496.67 MB  328.96 MB  part    /boot
———————————————————————————-
[root@hosted-engine exports.d]# blkid /dev/ssm/engine
### /etc/fstab 에 영구적으로 마운트 해줄 때는 꼭 block ID 로 해주자. ###

/dev/ssm/engine: UUID=”aa7eb35f-e496-4ecf-aa1e-b5cd7da1f4c8″ TYPE=”xfs”
[root@hosted-engine exports.d]# !! >> /etc/fstab
blkid /dev/ssm/engine >> /etc/fstab
[root@hosted-engine exports.d]# vim /etc/fstab
[root@hosted-engine exports.d]# mount -a
[root@hosted-engine exports.d]# df
### mount 가 잘 되엇는지 확인. ###

Filesystem             1K-blocks    Used Available Use% Mounted on
/dev/mapper/ssm-root    41922560 4172448  37750112  10% /
devtmpfs                 8124500       0   8124500   0% /dev
tmpfs                    8134132      80   8134052   1% /dev/shm
tmpfs                    8134132    9076   8125056   1% /run
tmpfs                    8134132       0   8134132   0% /sys/fs/cgroup
/dev/vda1                 508588  171760    336828  34% /boot
/dev/mapper/ssm-engine  31441920   32928  31408992   1% /engine
[root@hosted-engine exports.d]# ssm list
———————————————————–
Device         Free      Used      Total  Pool  Mount point
———————————————————–
/dev/vda                       100.00 GB        PARTITIONED
/dev/vda1                      500.00 MB        /boot
/dev/vda2   4.00 MB  44.00 GB   44.00 GB  ssm
/dev/vda3  25.50 GB  30.00 GB   55.51 GB  ssm
———————————————————–
————————————————-
Pool  Type  Devices      Free      Used     Total
————————————————-
ssm   lvm   2        25.51 GB  74.00 GB  99.50 GB
————————————————-
———————————————————————————-
Volume           Pool  Volume size  FS     FS size       Free  Type    Mount point
———————————————————————————-
/dev/ssm/root    ssm      40.00 GB  xfs   39.98 GB   35.94 GB  linear  /
/dev/ssm/swap    ssm       4.00 GB                             linear
/dev/ssm/engine  ssm      30.00 GB  xfs   29.99 GB   29.99 GB  linear  /engine
/dev/vda1                500.00 MB  xfs  496.67 MB  328.96 MB  part    /boot
———————————————————————————-
[root@hosted-engine exports.d]# pwd
/etc/exports.d
[root@hosted-engine exports.d]# systemctl status nfs-server
nfs-server.service – NFS server and services
Loaded: loaded (/usr/lib/systemd/system/nfs-server.service; disabled)
Active: inactive (dead)

[root@hosted-engine exports.d]# systemctl restart nfs-server
### 준비 다 되엇으면 nfs server를 올려준다. ###

[root@hosted-engine exports.d]# systemctl enable nfs-server
### 재부팅 시 자동적으로 daemon 가동 되게끔 설정 한다. ###

ln -s ‘/usr/lib/systemd/system/nfs-server.service’ ‘/etc/systemd/system/multi-user.target.wants/nfs-serve
r.service’
[root@hosted-engine exports.d]# exportfs
### nfs share 확인 ###

/engine         <world>
[root@hosted-engine exports.d]# showmount -e
Export list for hosted-engine:
/engine *
[root@hosted-engine exports.d]#
[root@hosted-engine exports.d]# screen -S lee
###screen 을 띄운다. ###

[root@hosted-engine ~]# hosted-engine –deploy
### hosted-engine deploy  ###

[ INFO  ] Stage: Initializing
[ INFO  ] Generating a temporary VNC password.
[ INFO  ] Stage: Environment setup
Continuing will configure this host for serving as hypervisor and create a VM where you have to
install oVirt Engine afterwards.
Are you sure you want to continue? (Yes, No)[Yes]:

### 별거없다 그냥 yes ###


Configuration files: []
Log file: /var/log/ovirt-hosted-engine-setup/ovirt-hosted-engine-setup-20151215030400-5sehtn.lo
g
Version: otopi-1.4.0 (otopi-1.4.0-1.el7.centos)
[ INFO  ] Hardware supports virtualization
[ INFO  ] Stage: Environment packages setup
[ INFO  ] Stage: Programs detection
[ INFO  ] Stage: Environment setup
[ INFO  ] Stage: Environment customization

–== STORAGE CONFIGURATION ==–

During customization use CTRL-D to abort.
Please specify the storage you would like to use (glusterfs, iscsi, fc, nfs3, nfs4)[nfs3]: nfs4

### 우리는 성능이 더 좋은 nfs4 로 쓸거다. rhel7 nfs server 가 share해주는 기본이 nfs 4임 ###

          Please specify the full shared storage connection path to use (example: host:/path): hosted-eng
ine:/engine

### 아까 share 해준 nfs volume을 여기서 쓴다. ###

[ INFO  ] Installing on first host
Please provide storage domain name. [hosted_storage]:

### storage domain name 인데 그냥 기본값 ㄱㄱ###

          Local storage datacenter name is an internal name
and currently will not be shown in engine’s admin UI.
Please enter local datacenter name [hosted_datacenter]:

### 기본값 ㄱㄱ ###

–== SYSTEM CONFIGURATION ==–

–== NETWORK CONFIGURATION ==–

Please indicate a nic to set ovirtmgmt bridge on: (ens8) [ens8]:

### 이건 가끔 bonding 같은거 해줫을때 다르게 나올 수 도 있으니 잘 보고 하자 ovirtmgmt 브릿지를 만들 물리 디바이스로 뭘 쓸 지 묻고 있다. ###


iptables was detected on your computer, do you wish setup to configure it? (Yes, No)[Yes]:

### iptables setting을 자동으로 해준단다. 우리가 하면 손이 아프니 ovirt에 맡기자. ###

          Please indicate a pingable gateway IP address [192.168.111.1]:

### gateway ip address ###


–== VM CONFIGURATION ==–

Please specify the device to boot the VM from (choose disk for the oVirt engine appliance)
(cdrom, disk, pxe) [disk]: cdrom

### cdrom image 를 가지고 인스톨 할거임 ###

          Please specify an alias for the Hosted Engine image [hosted_engine]:

### 그냥 기본값 ###


The following CPU types are supported by this host:
– model_Westmere: Intel Westmere Family
– model_Nehalem: Intel Nehalem Family
– model_Penryn: Intel Penryn Family
– model_Conroe: Intel Conroe Family
Please specify the CPU type to be used by the VM [model_Westmere]:

### cpu type 물어보는 건데 나중에 클러스터 묶을  때 필요한 값이다. 궂이 지금 쓰고 있는 cpu모델과 맞춰줄 필요는 없다. 그냥 기본 값으로 ㄱㄱ ###


Please specify path to installation media you would like to use [None]: /iso/CentOS-7-x86_64-DV
D-1503-01.iso

### cd iso 파일 경로를 넣어 준다. ###


Please specify the number of virtual CPUs for the VM [Defaults to minimum requirement: 2]: 4

### 사용 할 vm cpu  ###


Please specify the disk size of the VM in GB [Defaults to minimum requirement: 25]:

### 아까 30GB 바이트를 만들엇으니 25GB로 만들자. 30GB volume이라고 30GB 다 쓰면 안된다. 안에 matadata 영역이 있어서 다 쓰면 안됨. 그래봣자 몇 MB 안될테지만 그래도 널널하게 대인배 답게 5GB 정도 비워두자. ###


You may specify a unicast MAC address for the VM or accept a randomly generated default [00:16:
3e:68:97:c4]:

### mac address 인데 기본값 으로 하자 ###


Please specify the memory size of the VM in MB [Defaults to minimum requirement: 4096]: 8192

### 메모리인데 권장은 16GB 이다. 여기선 8GB  ###


Please specify the console type you would like to use to connect to the VM (vnc, spice) [vnc]:

### 화면전송 프로토콜인데 옛날에 spice로 했다가 뭔가 안됏던 기억이 있어서 난 그냥 vnc로 ^ㅅ^ 어차피 인스톨 말고 거의 안쓴다.  ###

–== HOSTED ENGINE CONFIGURATION ==–

Enter the name which will be used to identify this host inside the Administrator Portal [hosted
_engine_1]:

### admin potal 에서 보여질 hosted-engine 물리서버 이름이다. 이거 2중화 할거면 바꾸면 안된다. 기본값 ㄱㄱ ###


Enter ‘admin@internal’ user password that will be used for accessing the Administrator Portal:

### admin portal 에 들어갈때 쓸 암호. 당연히 나중에 바꿀 수 있음. ###


Confirm ‘admin@internal’ user password:
Please provide the FQDN for the engine you would like to use.
This needs to match the FQDN that you will use for the engine installation within the VM.
Note: This will be the FQDN of the VM you are now going to create,
it should not point to the base host or to any other existing machine.
Engine FQDN: engine.test.dom

### engine 의 FQND 포함한 이름 dns에 등록이 되어 있거나 hosts 파일에 들어가 있어야 한다. ###
[WARNING] Failed to resolve engine.test.dom using DNS, it can be resolved only locally
Please provide the name of the SMTP server through which we will send notifications [localhost]

### 통지 메일 보내줄건데 어디를 통해서 보내줄지 묻는것 기본값으로 하거나 갖고 있는 메일서버로 지정하면 되겟다. ###


:
Please provide the TCP port number of the SMTP server [25]:

###포트는 뭐쓰는지 묻는다 기본값 ###


Please provide the email address from which notifications will be sent [root@localhost]:

### 메일을 어떤 계정 어떤 서버에서 보내줄 지 묻고 있다. ###
Please provide a comma-separated list of email addresses which will get notifications [root@loc
alhost]:

### 메일을 누구한테 보낼지 묻고 있다. ###
[ INFO  ] Stage: Setup validation
[WARNING] Failed to resolve hosted-engine.test.dom using DNS, it can be resolved only locally

–== CONFIGURATION PREVIEW ==–

Bridge interface                   : ens8
Engine FQDN                        : engine.test.dom
Bridge name                        : ovirtmgmt
SSH daemon port                    : 22
Firewall manager                   : iptables
Gateway address                    : 192.168.111.1
Host name for web application      : hosted_engine_1
Host ID                            : 1
Image alias                        : hosted_engine
Image size GB                      : 25
GlusterFS Share Name               : hosted_engine_glusterfs
GlusterFS Brick Provisioning       : False
Storage connection                 : hosted-engine:/engine
Console type                       : vnc
Memory size MB                     : 8192
MAC address                        : 00:16:3e:68:97:c4
Boot type                          : cdrom
Number of CPUs                     : 4
ISO image (cdrom boot/cloud-init)  : /iso/CentOS-7-x86_64-DVD-1503-01.iso
CPU Type                           : model_Westmere

Please confirm installation settings (Yes, No)[Yes]:

### 확인 다 하고 yes 를 입력 ###


[ INFO  ] Stage: Transaction setup
[ INFO  ] Stage: Misc configuration
[ INFO  ] Stage: Package installation
[ INFO  ] Stage: Misc configuration
[ INFO  ] Configuring libvirt
[ INFO  ] Configuring VDSM
[ INFO  ] Starting vdsmd
[ INFO  ] Waiting for VDSM hardware info
[ INFO  ] Configuring the management bridge
[ INFO  ] Creating Storage Domain
[ INFO  ] Creating Storage Pool
[ INFO  ] Connecting Storage Pool
[ INFO  ] Verifying sanlock lockspace initialization
[ INFO  ] Creating VM Image
[ INFO  ] Destroying Storage Pool
[ INFO  ] Start monitoring domain
[ INFO  ] Configuring VM
[ INFO  ] Updating hosted-engine configuration
[ INFO  ] Stage: Transaction commit
[ INFO  ] Stage: Closing up
[ INFO  ] Creating VM
You can now connect to the VM with the following command:
/bin/remote-viewer vnc://localhost:5900

### 이 커맨드로 engine의 vnc 화면을 띄운다. ###
Use temporary password “0061uUGe” to connect to vnc console.

### 위에 암호로 vnc 서버를 접속 할 수 있다. ###


Please note that in order to use remote-viewer you need to be able to run graphical application
s.
This means that if you are using ssh you have to supply the -Y flag (enables trusted X11 forwar
ding).
Otherwise you can run the command from a terminal in your preferred desktop environment.
If you cannot run graphical applications you can connect to the graphic console from another ho
st or connect to the serial console using the following command:
socat UNIX-CONNECT:/var/run/ovirt-vmconsole-console/841a1802-2166-4989-9b6d-9a5c403a47d1.sock,u
ser=ovirt-vmconsole STDIO,raw,echo=0,escape=1
If you need to reboot the VM you will need to start it manually using the command:
hosted-engine –vm-start
You can then set a temporary password using the command:
hosted-engine –add-console-password

### 이 커맨드를 입력하고 암호를 재지정 할 수 도 있다. ###

The VM has been started.
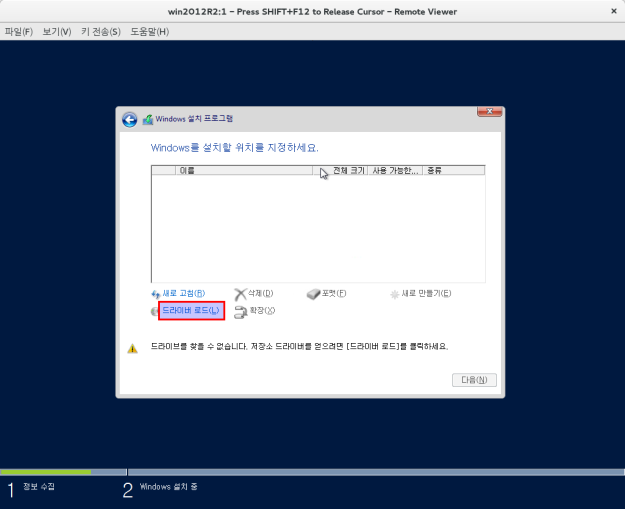
To continue please install OS and shutdown or reboot the VM.

Make a selection from the options below:
(1) Continue setup – OS installation is complete
(2) Power off and restart the VM
(3) Abort setup
(4) Destroy VM and abort setup

(1, 2, 3, 4)[1]:

### OS 인스톨이 다 끝나면 reboot 을 누르고 꺼진거 확인 후 1번 을 입력한다. ###

          Please reboot or shutdown the VM.

Verifying shutdown…
[ INFO  ] Creating VM
You can now connect to the VM with the following command:
/bin/remote-viewer vnc://localhost:5900
Use temporary password “0061uUGe” to connect to vnc console.
Please note that in order to use remote-viewer you need to be able to run graphical application
s.
This means that if you are using ssh you have to supply the -Y flag (enables trusted X11 forwar
ding).
Otherwise you can run the command from a terminal in your preferred desktop environment.
If you cannot run graphical applications you can connect to the graphic console from another ho
st or connect to the serial console using the following command:
socat UNIX-CONNECT:/var/run/ovirt-vmconsole-console/841a1802-2166-4989-9b6d-9a5c403a47d1.sock,u
ser=ovirt-vmconsole STDIO,raw,echo=0,escape=1
If you need to reboot the VM you will need to start it manually using the command:
hosted-engine –vm-start
You can then set a temporary password using the command:
hosted-engine –add-console-password
Please install and setup the engine in the VM.
You may also be interested in installing ovirt-guest-agent-common package in the VM.

The VM has been rebooted.
To continue please install oVirt-Engine in the VM
(Follow http://www.ovirt.org/Quick_Start_Guide for more info).

Make a selection from the options below:
(1) Continue setup – oVirt-Engine installation is ready and ovirt-engine service is up
### ovirt engine install 이 다 끝나면 1을 입력 해주자. ###
(2) Power off and restart the VM
### 리붓할 때는 2를 입력 ###
(3) Abort setup
### install 취소 할때는 3 입력. 이것보다 4를 입력 하는게 더 좋다. ###
(4) Destroy VM and abort setup
### install 취소 및 vm 없애는 건데 그냥 3을 입력하면 vm 찌꺼기가 남기 때문에 다시 인스톨 하려고 하면 erro
r messagem가 뜨면서 안된다 4를 입력 하면 다시 인스톨 할 때 잘됨. ###
### 암턴 3은 입력 하지 마라. ###

          (1, 2, 3, 4)[1]:

이 후는 engine install 임.

vm 위에 vm이라 더럽게 느림…ㅠ 오래 걸렷다…

2부에 계속….

centos 7 nested kvm configuration

ovirt test 는 해야하는데 서버가 한대 밖에 없을때… nested kvm 을 이용해서 극복해보자..!!

먼저 ovirt 에 여러대의 host를 붙이고 싶은데 여건상 그렇지 못할 때 유용한 방법이다.

kvm 에 있는 nested kvm(중복 kvm) 을 이용하여 hypervisor 위에 또 hypervisor를 올릴 수 가 있다.

모듈옵션을 enable 시키자
$ vim /etc/modprobe.d/kvm-nested.conf
options kvm_intel nested=1
options kvm_intel enable_shadow_vmcs=1
options kvm_intel enable_apicv=1
options kvm_intel ept=1

처음에 할때 “option kvm_intel nested=1” 이것만 했는데 문제가 있더라…
뭔 messages 로그에 계속 커널 크래시 어쩌구 뜨길래 centos 커뮤니티 에 문의를 해봣더니 양키 성님이 답변을 주셧다…  자기도 그런적이 잇다고.. 그래서 저 3줄 추가 해서 고쳣다드라.  귀찮아서 찾아보진 않았는데 저거 3줄 추가 하니까 메세지에서 더이상 에러가 뜨질 않더라.

모듈을 새로 올리자
$ modprobe -r kvm_intel
$ modprobe kvm_intel

이것을 확인해서 활성화 되어 있는지 확인한다.
$ cat /sys/module/kvm_intel/parameters/nested

$ virsh edit <domain 명>
현재 만든 centos 7 의 도메인 명을적어서 “cpu mode” section 을 “host-passthrough” 로 수정한다.

그리고 가상머신 부팅 후 ‘lscpu’ 명령어로 vt-x 가 잘 되어 있는지 확인 한다.

그리고 ovirt를 올리자.!!