rhev3.6 → rhv4 upgrade
일단 rhev3.6 과 rhv4 를 설치한다.
우선 3.5나 그 이하버전에서 4.0으로는 갈 수 없다. 무조건 3.6에서만 갈 수 있다.
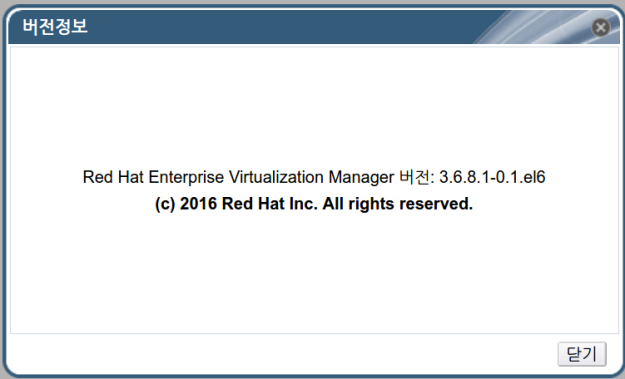
현재상태
Red Hat Enterprise Virtualization Manager 버전: 3.6.8.1-0.1.el6
(c) 2016 Red Hat Inc. All rights reserved.

host 상태 잘 올라와 있는걸 확인 할 수 있다.
hypervisor os 는 각각 datacenter version을 다르게 하여 rhel6(3.5)과 rhel7(3.6)을 올렸다.

가상머신 2대도 잘 올라간다.
[root@upgrade36 ~]# engine-backup --scope=all --mode=backup --file=backup.bck --log=backuplog.log
Backing up:
Notifying engine
- Files
- Engine database 'engine'
Packing into file 'backup.bck'
Notifying engine
Done.
[root@upgrade36 ~]#
rhv4 를 설치할 node에서 아래 명령어 실행 한다.
[root@upgrade4 ~]# engine-backup --mode=restore --file=backup.bck --log=restore.log --provision-db --no-restore-permissions [92/5152]
Preparing to restore:
- Unpacking file 'backup.bck'
Restoring:
- Files
------------------------------------------------------------------------------
Please note:
Operating system is different from the one used during backup.
Current operating system: redhat7
Operating system at backup: redhat6
Apache httpd configuration will not be restored.
You will be asked about it on the next engine-setup run.
------------------------------------------------------------------------------
Provisioning PostgreSQL users/databases:
- user 'engine', database 'engine'
Restoring:p temporary tables in engine database 'engine'
------------------------------------------------------------------------------
Please note:
The engine database was backed up at 2016-08-30 17:52:57.000000000 +0900 .
Objects that were added, removed or changed after this date, such as virtual
machines, disks, etc., are missing in the engine, and will probably require
recovery or recreation.
------------------------------------------------------------------------------
You should now run engine-setup.
Done.
[root@upgrade4 ~]#
[root@upgrade4 ~]# engine-setup
[ INFO ] Stage: Initializing
[ INFO ] Stage: Environment setup
Configuration files: ['/etc/ovirt-engine-setup.conf.d/10-packaging-wsp.conf', '/etc/ovirt-engine-setup.conf.d/10-packaging.conf', '/etc/ovirt-engine-setup.conf.d/20-setup-ovirt-post.con
f']
Log file: /var/log/ovirt-engine/setup/ovirt-engine-setup-20160830180514-zag09e.log
Version: otopi-1.5.1 (otopi-1.5.1-3.el7ev)
[ INFO ] Stage: Environment packages setup
[ INFO ] Stage: Programs detection
[ INFO ] Stage: Environment setup
[ INFO ] Stage: Environment customization
Welcome to the RHEV 4.0 setup/upgrade.
Please read the RHEV 4.0 install guide
https://access.redhat.com/site/documentation/en-US/Red_Hat_Enterprise_Virtualization/4.0/html/Installation_Guide/index.html.
Please refer to the RHEV Upgrade Helper application
https://access.redhat.com/labs/rhevupgradehelper/ which will guide you in the upgrading process.
Would you like to proceed? (Yes, No) [Yes]:
--== PRODUCT OPTIONS ==--
Configure Image I/O Proxy on this host? (Yes, No) [Yes]:
Please note: Data Warehouse is required for the engine. If you choose to not configure it on this host, you have to configure it on a remote host, and then configure the engine on this
host so that it can access the database of the remote Data Warehouse host.
Configure Data Warehouse on this host (Yes, No) [Yes]: no
--== PACKAGES ==--
[ INFO ] Checking for product updates...
[ INFO ] No product updates found
--== NETWORK CONFIGURATION ==--
Setup can automatically configure the firewall on this system.
Note: automatic configuration of the firewall may overwrite current settings.
Do you want Setup to configure the firewall? (Yes, No) [Yes]:
[WARNING] Firewall manager was previously set to 'iptables', which is currently not available.
[ INFO ] firewalld will be configured as firewall manager.
--== DATABASE CONFIGURATION ==--
--== OVIRT ENGINE CONFIGURATION ==--
--== STORAGE CONFIGURATION ==--
--== PKI CONFIGURATION ==--
--== APACHE CONFIGURATION ==--
Setup can configure the default page of the web server to present the application home page. This may conflict with existing applications.
Do you wish to set the application as the default page of the web server? (Yes, No) [Yes]:
Setup can configure apache to use SSL using a certificate issued from the internal CA.
Do you wish Setup to configure that, or prefer to perform that manually? (Automatic, Manual) [Automatic]:
--== SYSTEM CONFIGURATION ==--
--== MISC CONFIGURATION ==--
--== END OF CONFIGURATION ==--
[ INFO ] Stage: Setup validation
[ ERROR ] Failed to execute stage 'Setup validation': Trying to upgrade from unsupported versions: 3.5
[ INFO ] Stage: Clean up
Log file is located at /var/log/ovirt-engine/setup/ovirt-engine-setup-20160830180514-zag09e.log
[ INFO ] Generating answer file '/var/lib/ovirt-engine/setup/answers/20160830180540-setup.conf'
[ INFO ] Stage: Pre-termination
[ INFO ] Stage: Termination
[ ERROR ] Execution of setup failed
[root@upgrade4 ~]#
3.5 버전에서 upgrade 하는것은 서포트 하지 않는다고 나온다. 분명 3.6.8 version 에서 upgrade 하는데 위와 같은 결과가 나왔다. logfile 에서도 같은 message가 있다.
3.6 에서 3.5 버전호환 datacenter 가 있었다. 이걸 지우고 다시 해보자.
[root@upgrade4 ~]# !116
engine-backup --mode=restore --file=backup2.bck --log=restore.log --provision-db --no-restore-permissions
Preparing to restore:
- Unpacking file 'backup2.bck'
Restoring:
- Files
------------------------------------------------------------------------------
Please note:
Operating system is different from the one used during backup.
Current operating system: redhat7
Operating system at backup: redhat6
Apache httpd configuration will not be restored.
You will be asked about it on the next engine-setup run.
------------------------------------------------------------------------------
Provisioning PostgreSQL users/databases:
- user 'engine', database 'engine'
FATAL: Existing database 'engine' or user 'engine' found and temporary ones created - Please clean up everything and try again
[root@upgrade4 ~]#
engine-backup restore 를 했더니 위와같은 error 가 떳다.
database engine 이나 user engine 이 이미 있다고 뿌려준 error 이다. 지워주자.
[root@upgrade4 ~]# !su
su - postgres
마지막 로그인: 화 8월 30 18:26:06 KST 2016 일시 pts/0
-bash-4.2$ psql
psql (9.2.15)
Type "help" for help.
postgres=# \l
List of databases
Name | Owner | Encoding | Collate | Ctype | Access privileges
-----------------------+-----------------------+----------+-------------+-------------+-----------------------
engine | engine | UTF8 | en_US.UTF-8 | en_US.UTF-8 |
engine_20160830182408 | engine_20160830182408 | UTF8 | en_US.UTF-8 | en_US.UTF-8 |
postgres | postgres | UTF8 | ko_KR.UTF-8 | ko_KR.UTF-8 |
template0 | postgres | UTF8 | ko_KR.UTF-8 | ko_KR.UTF-8 | =c/postgres +
| | | | | postgres=CTc/postgres
template1 | postgres | UTF8 | ko_KR.UTF-8 | ko_KR.UTF-8 | =c/postgres +
| | | | | postgres=CTc/postgres
(5 rows)
postgres=# drop database engine;
DROP DATABASE
postgres=# drop database engine_20160830182408;
DROP DATABASE
postgres=# drop user engine;
DROP ROLE
postgres=# drop role engine;
ERROR: role "engine" does not exist
postgres=# \deu
List of user mappings
Server | User name
--------+-----------
(0 rows)
postgres=#
database ‘engine’ 과 user role ‘engine’ 이 지워진 것을 확인 했다.
[root@upgrade4 ~]# !engine
engine-backup –mode=restore –file=backup2.bck –log=restore.log –provision-db –no-restore-permissions
Preparing to restore:
– Unpacking file ‘backup2.bck’
Restoring:
– Files
——————————————————————————
Please note:
Operating system is different from the one used during backup.
Current operating system: redhat7
Operating system at backup: redhat6
Apache httpd configuration will not be restored.
You will be asked about it on the next engine-setup run.
——————————————————————————
Provisioning PostgreSQL users/databases:
– user ‘engine’, database ‘engine’
Restoring:
– Engine database ‘engine’
– Cleaning up temporary tables in engine database ‘engine’
——————————————————————————
Please note:
The engine database was backed up at 2016-08-30 18:19:01.000000000 +0900 .
Objects that were added, removed or changed after this date, such as virtual
machines, disks, etc., are missing in the engine, and will probably require
recovery or recreation.
——————————————————————————
You should now run engine-setup.
Done.
[root@upgrade4 ~]#
restore 가 잘 되었다.
[root@upgrade4 ~]# engine-setup
[ INFO ] Stage: Initializing
[ INFO ] Stage: Environment setup
Configuration files: [‘/etc/ovirt-engine-setup.conf.d/10-packaging-wsp.conf’, ‘/etc/ovirt-engine-setup.conf.d/10-packaging.conf’, ‘/etc/ovirt-engine-setup.conf.d/20-setup-ovirt-post.con
f’]
Log file: /var/log/ovirt-engine/setup/ovirt-engine-setup-20160830183849-cft2zg.log
Version: otopi-1.5.1 (otopi-1.5.1-3.el7ev)
[ INFO ] Stage: Environment packages setup
[ INFO ] Stage: Programs detection
[ INFO ] Stage: Environment setup
[ INFO ] Stage: Environment customization
Welcome to the RHEV 4.0 setup/upgrade.
Please read the RHEV 4.0 install guide
Please refer to the RHEV Upgrade Helper application
https://access.redhat.com/labs/rhevupgradehelper/ which will guide you in the upgrading process.
Would you like to proceed? (Yes, No) [Yes]:
–== PRODUCT OPTIONS ==–
Configure Image I/O Proxy on this host? (Yes, No) [Yes]:
Please note: Data Warehouse is required for the engine. If you choose to not configure it on this host, you have to configure it on a remote host, and then configure the engine on this
host so that it can access the database of the remote Data Warehouse host.
Configure Data Warehouse on this host (Yes, No) [Yes]: no
–== PACKAGES ==–
[ INFO ] Checking for product updates…
[ INFO ] No product updates found
–== NETWORK CONFIGURATION ==–
Setup can automatically configure the firewall on this system.
Note: automatic configuration of the firewall may overwrite current settings.
Do you want Setup to configure the firewall? (Yes, No) [Yes]:
[WARNING] Firewall manager was previously set to ‘iptables’, which is currently not available.
[ INFO ] firewalld will be configured as firewall manager.
–== DATABASE CONFIGURATION ==–
–== OVIRT ENGINE CONFIGURATION ==–
–== STORAGE CONFIGURATION ==–
–== PKI CONFIGURATION ==–
–== APACHE CONFIGURATION ==–
Setup can configure the default page of the web server to present the application home page. This may conflict with existing applications.
Do you wish to set the application as the default page of the web server? (Yes, No) [Yes]:
Setup can configure apache to use SSL using a certificate issued from the internal CA.
Do you wish Setup to configure that, or prefer to perform that manually? (Automatic, Manual) [Automatic]:
–== SYSTEM CONFIGURATION ==–
–== MISC CONFIGURATION ==–
–== END OF CONFIGURATION ==–
[ INFO ] Stage: Setup validation
[ ERROR ] Failed to execute stage ‘Setup validation’: Trying to upgrade from unsupported versions: 3.5
[ INFO ] Stage: Clean up
Log file is located at /var/log/ovirt-engine/setup/ovirt-engine-setup-20160830183849-cft2zg.log
[ INFO ] Generating answer file ‘/var/lib/ovirt-engine/setup/answers/20160830183909-setup.conf’
[ INFO ] Stage: Pre-termination
[ INFO ] Stage: Termination
[ ERROR ] Execution of setup failed
[root@upgrade4 ~]#
3.5 호환버전 datacenter를 삭제 했지만 여전히 같은 error 로 진행이 안된다.
확인 해 봤더니 datacenter 는 삭제 되었지만 3.5 버전 호환 cluster 가 남아 있었다. 이걸 지우고 다시 백업 후 복구를 해봤다.
[root@upgrade4 ~]# engine-setup [89/9065]
[ INFO ] Stage: Initializing
[ INFO ] Stage: Environment setup
Configuration files: [‘/etc/ovirt-engine-setup.conf.d/10-packaging-wsp.conf’, ‘/etc/ovirt-engine-setup.conf.d/10-packaging.conf’, ‘/etc/ovirt-engine-setup.conf.d/20-setup-ovirt-post.con
f’]
Log file: /var/log/ovirt-engine/setup/ovirt-engine-setup-20160830191209-ese3kl.log
Version: otopi-1.5.1 (otopi-1.5.1-3.el7ev)
[ INFO ] Stage: Environment packages setup
[ INFO ] Stage: Programs detection
[ INFO ] Stage: Environment setup
[ INFO ] Stage: Environment customization
Welcome to the RHEV 4.0 setup/upgrade.
Please read the RHEV 4.0 install guide
Please refer to the RHEV Upgrade Helper application
https://access.redhat.com/labs/rhevupgradehelper/ which will guide you in the upgrading process.
Would you like to proceed? (Yes, No) [Yes]:
–== PRODUCT OPTIONS ==–
Configure Image I/O Proxy on this host? (Yes, No) [Yes]:
Please note: Data Warehouse is required for the engine. If you choose to not configure it on this host, you have to configure it on a remote host, and then configure the engine on this
host so that it can access the database of the remote Data Warehouse host.
Configure Data Warehouse on this host (Yes, No) [Yes]: no
–== PACKAGES ==–
[ INFO ] Checking for product updates…
[ INFO ] No product updates found
–== NETWORK CONFIGURATION ==–
Setup can automatically configure the firewall on this system.
Note: automatic configuration of the firewall may overwrite current settings.
Do you want Setup to configure the firewall? (Yes, No) [Yes]:
[WARNING] Firewall manager was previously set to ‘iptables’, which is currently not available.
[ INFO ] firewalld will be configured as firewall manager.
–== DATABASE CONFIGURATION ==–
–== OVIRT ENGINE CONFIGURATION ==–
–== STORAGE CONFIGURATION ==–
–== PKI CONFIGURATION ==–
–== APACHE CONFIGURATION ==–
Setup can configure the default page of the web server to present the application home page. This may conflict with existing applications.
Do you wish to set the application as the default page of the web server? (Yes, No) [Yes]:
Setup can configure apache to use SSL using a certificate issued from the internal CA.
Do you wish Setup to configure that, or prefer to perform that manually? (Automatic, Manual) [Automatic]:
–== SYSTEM CONFIGURATION ==–
–== MISC CONFIGURATION ==–
–== END OF CONFIGURATION ==–
[ INFO ] Stage: Setup validation
[WARNING] Less than 16384MB of memory is available
[ INFO ] Cleaning stale zombie tasks and commands
–== CONFIGURATION PREVIEW ==–
Default SAN wipe after delete : False
Firewall manager : firewalld
Update Firewall : True
Host FQDN : upgrade36.test.dom
Engine database secured connection : False
Engine database host : localhost
Engine database user name : engine
Engine database name : engine
Engine database port : 5432
Engine database host name validation : False
Engine installation : True
PKI organization : test.dom
Set application as default page : True
Configure Apache SSL : True
DWH installation : False
Configure local DWH database : False
Engine Host FQDN : upgrade36.test.dom
Configure Image I/O Proxy : True
Configure VMConsole Proxy : True
Configure WebSocket Proxy : True
Please confirm installation settings (OK, Cancel) [OK]:
[ INFO ] Cleaning async tasks and compensations
[ INFO ] Unlocking existing entities
[ INFO ] Checking the Engine database consistency
[ INFO ] Stage: Transaction setup
[ INFO ] Stopping engine service
[ INFO ] Stopping ovirt-fence-kdump-listener service
[ INFO ] Stopping Image I/O Proxy service
[ INFO ] Stopping websocket-proxy service
[ INFO ] Stage: Misc configuration
[ INFO ] Stage: Package installation
[ INFO ] Stage: Misc configuration
[ INFO ] Upgrading CA
[ INFO ] Backing up database localhost:engine to ‘/var/lib/ovirt-engine/backups/engine-20160830191245.trnZdh.dump’.
[ INFO ] Creating/refreshing Engine database schema
[ INFO ] Configuring Image I/O Proxy
[ INFO ] Configuring WebSocket Proxy
[ INFO ] Creating/refreshing Engine ‘internal’ domain database schema
[ INFO ] Generating post install configuration file ‘/etc/ovirt-engine-setup.conf.d/20-setup-ovirt-post.conf’
[ INFO ] Stage: Transaction commit
[ INFO ] Stage: Closing up
[ INFO ] Starting engine service
[ ERROR ] Failed to execute stage ‘Closing up’: Failed to start service ‘ovirt-imageio-proxy’
[ INFO ] Stage: Clean up
Log file is located at /var/log/ovirt-engine/setup/ovirt-engine-setup-20160830191209-ese3kl.log
[ INFO ] Generating answer file ‘/var/lib/ovirt-engine/setup/answers/20160830191611-setup.conf’
[ INFO ] Stage: Pre-termination
[ INFO ] Stage: Termination
[ ERROR ] Execution of setup failed
[root@upgrade4 ~]#
… 이전 error 는 지나갔는데 새로운 데서 error 가 생겼다…
[root@upgrade4 ~]# systemctl status ovirt-engine
● ovirt-engine.service – oVirt Engine
Loaded: loaded (/usr/lib/systemd/system/ovirt-engine.service; enabled; vendor preset: disabled)
Active: active (running) since 화 2016-08-30 19:16:10 KST; 40min ago
Main PID: 24680 (ovirt-engine.py)
CGroup: /system.slice/ovirt-engine.service
├─24680 /usr/bin/python /usr/share/ovirt-engine/services/ovirt-engine/ovirt-engine.py –redirect-output –systemd=notify start
└─24747 ovirt-engine -server -XX:+TieredCompilation -Xms1024M -Xmx1024M -Djava.awt.headless=true -Dsun.rmi.dgc.client.gcInterval=3600000 -Dsun.rmi.dgc.server.gcInterval=3600000 -Djs…
8월 30 19:16:08 upgrade4.test.dom systemd[1]: Starting oVirt Engine…
8월 30 19:16:10 upgrade4.test.dom systemd[1]: Started oVirt Engine.
[root@upgrade4 ~]#
일단 ovirt-engine service 가 올라오긴 햇는데…
[root@upgrade4 bin]# /usr/share/ovirt-engine/setup/bin/ovirt-engine-rename
[ INFO ] Stage: Initializing
Welcome to the ovirt-engine-rename utility
More details about the operation and possible implications
of running this utility can be found here:
http://www.ovirt.org/Changing_Engine_Hostname
[ INFO ] Stage: Environment setup
Configuration files: [‘/etc/ovirt-engine-setup.conf.d/10-packaging-wsp.conf’, ‘/etc/ovirt-engine-setup.conf.d/10-packaging.conf’, ‘/etc/ovirt-engine-setup.conf.d/20-setup-ovirt-post.con
f’]
Log file: /var/log/ovirt-engine/setup/ovirt-engine-rename-20160830195843-tiyd2o.log
Version: otopi-1.5.1 (otopi-1.5.1-3.el7ev)
[ INFO ] Stage: Environment packages setup
[ INFO ] Stage: Programs detection
[ INFO ] Stage: Environment setup
[ INFO ] Stage: Environment customization
New fully qualified server name: []: upgrade4.test.dom
–== PRODUCT OPTIONS ==–
[ INFO ] Stage: Setup validation
During execution engine service will be stopped (OK, Cancel) [OK]:
[ INFO ] The following files will be updated:
/etc/ovirt-engine/engine.conf.d/10-setup-protocols.conf
/etc/ovirt-engine/imageuploader.conf.d/10-engine-setup.conf
/etc/ovirt-engine/isouploader.conf.d/10-engine-setup.conf
/etc/ovirt-engine/logcollector.conf.d/10-engine-setup.conf
/etc/ovirt-engine/ovirt-vmconsole-proxy-helper.conf.d/10-setup.conf
/etc/pki/ovirt-engine/cert.conf
/etc/pki/ovirt-engine/cert.template
/etc/pki/ovirt-engine/certs/apache.cer
/etc/pki/ovirt-engine/keys/apache.key.nopass
/etc/pki/ovirt-engine/keys/apache.p12
[ INFO ] Stage: Transaction setup
[ INFO ] Stopping engine service
[ INFO ] Stage: Misc configuration
[ INFO ] Stage: Package installation
[ INFO ] Stage: Misc configuration
[ INFO ] Generating post install configuration file ‘/etc/ovirt-engine-setup.conf.d/20-setup-ovirt-post.conf’
[ INFO ] Stage: Transaction commit
[ INFO ] Stage: Closing up
–== SUMMARY ==–
[ INFO ] Starting engine service
[ INFO ] Restarting httpd
Rename completed successfully
–== END OF SUMMARY ==–
[ INFO ] Stage: Clean up
Log file is located at /var/log/ovirt-engine/setup/ovirt-engine-rename-20160830195843-tiyd2o.log
[ INFO ] Generating answer file ‘/var/lib/ovirt-engine/setup/answers/20160830195915-rename.conf’
[ INFO ] Stage: Pre-termination
[ INFO ] Stage: Termination
[ INFO ] Execution of rename completed successfully
[root@upgrade4 bin]#
내 경우 hostname 이 바뀌어서 ovirt-engine-rename command를 실행 시켜주었다.
[root@upgrade4 bin]# systemctl status ovirt-imageio-proxy.service
● ovirt-imageio-proxy.service – oVirt ImageIO Proxy
Loaded: loaded (/usr/lib/systemd/system/ovirt-imageio-proxy.service; enabled; vendor preset: disabled)
Active: failed (Result: start-limit) since 화 2016-08-30 20:02:09 KST; 25s ago
Process: 25691 ExecStart=/usr/bin/ovirt-imageio-proxy (code=exited, status=1/FAILURE)
Main PID: 25691 (code=exited, status=1/FAILURE)
8월 30 20:02:08 upgrade4.test.dom systemd[1]: Failed to start oVirt ImageIO Proxy.
8월 30 20:02:08 upgrade4.test.dom systemd[1]: Unit ovirt-imageio-proxy.service entered failed state.
8월 30 20:02:08 upgrade4.test.dom systemd[1]: ovirt-imageio-proxy.service failed.
8월 30 20:02:09 upgrade4.test.dom systemd[1]: ovirt-imageio-proxy.service holdoff time over, scheduling restart.
8월 30 20:02:09 upgrade4.test.dom systemd[1]: start request repeated too quickly for ovirt-imageio-proxy.service
8월 30 20:02:09 upgrade4.test.dom systemd[1]: Failed to start oVirt ImageIO Proxy.
8월 30 20:02:09 upgrade4.test.dom systemd[1]: Unit ovirt-imageio-proxy.service entered failed state.
8월 30 20:02:09 upgrade4.test.dom systemd[1]: ovirt-imageio-proxy.service failed.
[root@upgrade4 bin]#
그래도 여전히 이건 안올라오더라… 이건 다음 이시간에…
이후 cluster 호환버전을 4.0으로 올려주고, datacenter 호환버전을 4.0으로 올려준 후, hypervisor host를 rhv4.0 repo 추가하고 upgrade 해주었다.
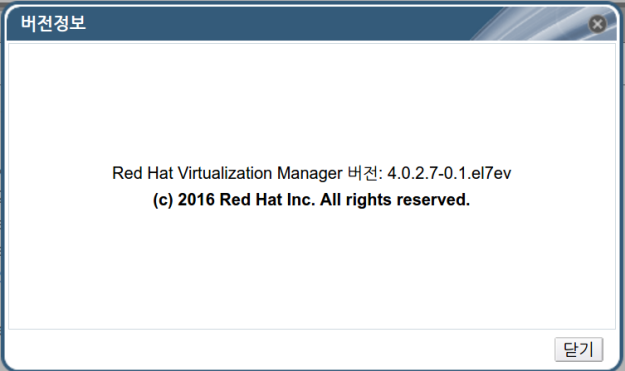
버전정보
Red Hat Virtualization Manager 버전: 4.0.2.7-0.1.el7ev
(c) 2016 Red Hat Inc. All rights reserved.

데이터센터 호환버전 4.0

클러스터 호환버전 4.0

가상머신도 잘 올라가는것을 확인 하였다.


