luci를 이용한 cluster share resouce 생성
luci webpage에서 …
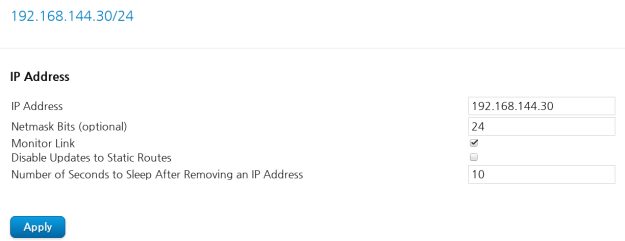
Manage Clusters > Resouces > Add > IP Address


### !!! file system ID 는 비워둔다. (자동으로 들어감) ###
### file system resource는 위의 lvm 과 같게 만들어준다. 총 6개 !! ###
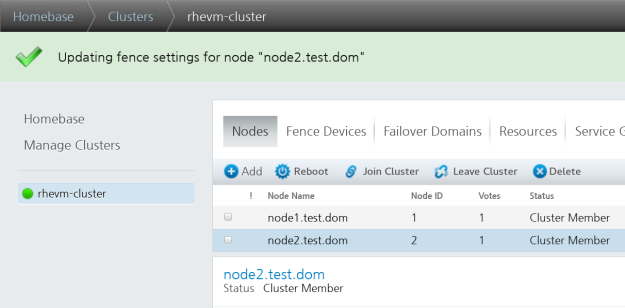
Manage Clusters > rhevm-cluster > service Groups > Add
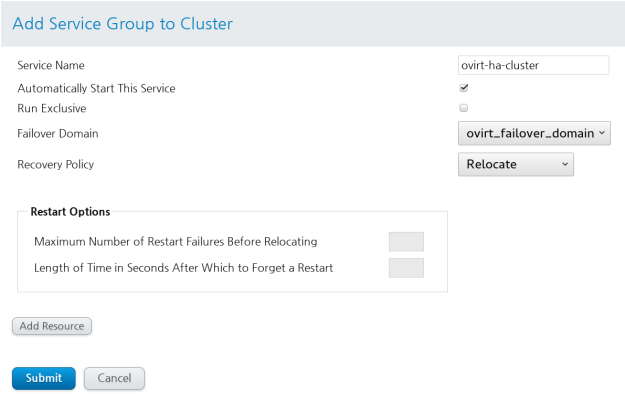
Cluster 의 Service Group 생성 후 Add Resouce 를 클릭
192.168.144.30/24
ovirt ha lvm
etc-ovirt-engine
usr-share-ovirt-engine
usr-share-ovirt-engine
usr-share-ovirt-engine-wildfly
var-lib-ovirt-engine
var-lib-pgsql
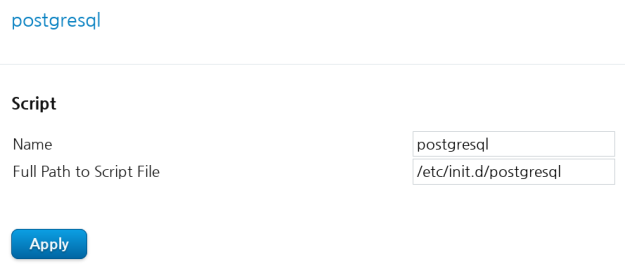
postgresql
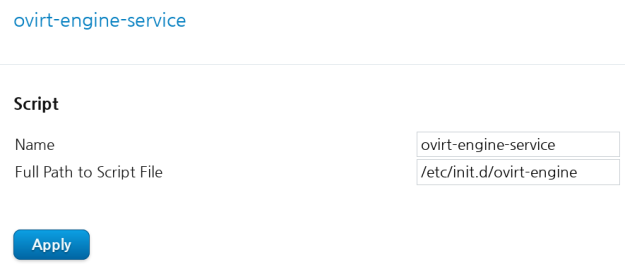
ovirt-engine-service
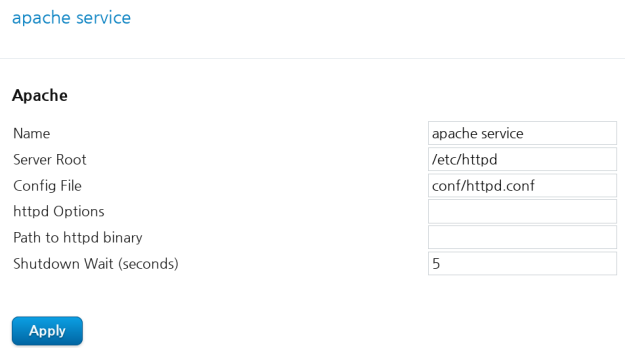
apache service
### 위와 같은 순서로 resouce 등록 (apache service 가 IP Address 보다 앞에 있으면 안됨)###
### /etc/cluster/cluster.conf (예제) ###
<?xml version=”1.0″?>
<cluster config_version=”33″ name=”rhevm-cluster”>
<clusternodes>
<clusternode name=”node1.test.dom” nodeid=”1″>
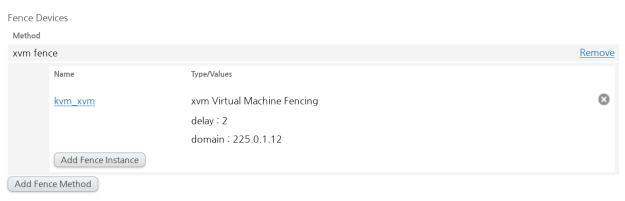
<fence>
<method name=”xvm fence”>
<device delay=”1″ domain=”225.0.1.12″ name=”kvm_xvm”/>
</method>
</fence>
</clusternode>
<clusternode name=”node2.test.dom” nodeid=”2″>
<fence>
<method name=”xvm fence”>
<device delay=”2″ domain=”225.0.1.12″ name=”kvm_xvm”/>
</method>
</fence>
</clusternode>
</clusternodes>
<cman expected_votes=”1″ two_node=”1″/>
<fencedevices>
<fencedevice agent=”fence_xvm” name=”kvm_xvm” timeout=”2″/>
</fencedevices>
<rm>
<failoverdomains>
<failoverdomain name=”ovirt_failover_domain” ordered=”1″ restricted=”1″>
<failoverdomainnode name=”node1.test.dom” priority=”1″/>
<failoverdomainnode name=”node2.test.dom” priority=”2″/>
</failoverdomain>
</failoverdomains>
<resources>
<ip address=”192.168.144.30/24″ sleeptime=”10″/>
<lvm name=”ovirt ha lvm” vg_name=”RHEVM”/>
<fs device=”/dev/RHEVM/etc-ovirt-engine” fsid=”63050″ fstype=”ext4″ mountpoint=”/etc/ovirt-engine” name=”etc-ovirt-engine” self_fence=”1″/>
<fs device=”/dev/RHEVM/usr-share-ovirt-engine” fsid=”45498″ fstype=”ext4″ mountpoint=”/usr/share/ovirt-engine” name=”usr-share-ovirt-engine” self_fence=”1″/>
<fs device=”/dev/RHEVM/usr-share-ovirt-engine-wildfly” fsid=”27022″ fstype=”ext4″ mountpoint=”/usr/share/ovirt-engine-wildfly” name=”usr-share-ovirt-engine-wildfly” self_fence=”1″/>
<fs device=”/dev/RHEVM/var-lib-ovirt-engine” fsid=”38611″ fstype=”ext4″ mountpoint=”/var/lib/ovirt-engine” name=”var-lib-ovirt-engine” self_fence=”1″/>
<fs device=”/dev/RHEVM/var-lib-pgsql” fsid=”47186″ fstype=”ext4″ mountpoint=”/var/lib/pgsql” name=”var-lib-pgsql” self_fence=”1″/>
<script file=”/etc/init.d/postgresql” name=”postgresql”/>
<script file=”/etc/init.d/ovirt-engine” name=”ovirt-engine-service”/>
<apache config_file=”conf/httpd.conf” name=”apache service” server_root=”/etc/httpd” shutdown_wait=”5″/>
<fs device=”/dev/RHEVM/etc-pki-ovirt-engine” fsid=”8507″ fstype=”ext4″ mountpoint=”/etc/pki/ovirt-engine” name=”etc-pki-ovirt-engine” self_fence=”1″/>
</resources>
<service domain=”ovirt_failover_domain” name=”ovirt-ha-cluster” recovery=”relocate”>
<ip ref=”192.168.144.30/24″/>
<lvm ref=”ovirt ha lvm”/>
<fs ref=”etc-ovirt-engine”/>
<fs ref=”etc-pki-ovirt-engine”/>
<fs ref=”usr-share-ovirt-engine”/>
<fs ref=”usr-share-ovirt-engine-wildfly”/>
<fs ref=”var-lib-ovirt-engine”/>
<fs ref=”var-lib-pgsql”/>
<script ref=”postgresql”/>
<script ref=”ovirt-engine-service”/>
<apache ref=”apache service”/>
</service>
</rm>
</cluster>
[root@node1 ~]# clusvcadm –r ovirt-ha-cluster
Trying to relocate service:ovirt-ha-cluster…Success
[root@node1 ~]# clustat
Cluster Status for rhevm-cluster @ Wed May 18 15:54:49 2016
Member Status: Quorate
Member Name ID Status
—— —- —- ——
node1.test.dom 1 Online, Local, rgmanager
node2.test.dom 2 Online, rgmanager
Service Name Owner (Last) State
——- —- —– —— —–
service:ovirt-ha-cluster node2.test.dom started
### cluster 절차 test. 이와 같이 나오면 성공!! ###
^ㅡ
^